To clean outdoor windows like a pro, start by gathering essential tools: a sturdy ladder, squeegee, microfiber cloths, and safety gear. Choose an overcast day and early morning hours to avoid sun glare. Remove cobwebs and debris, then mix a professional solution of dish soap and vinegar with warm water. Master the S-pattern technique, working from top to bottom while maintaining a 45-degree squeegee angle. These proven steps lay the foundation for achieving that coveted streak-free finish.
Gather Essential Tools and Safety Equipment

Three essential tools form the foundation of safe and effective outdoor window cleaning: a sturdy extension ladder, a reliable window cleaning kit, and proper safety gear. Your window cleaning kit should include a professional-grade squeegee, microfiber cloths, and a bucket for your cleaning solution. For safety equipment, you'll need non-slip shoes, a tool belt to keep supplies within reach, and rubber gloves to protect your hands.
When working with a ladder, guarantee it's positioned on level ground and locked securely. If you're cleaning second-story windows, consider using a ladder stabilizer attachment for extra security. Don't forget to check weather conditions before starting – avoid cleaning in strong winds or rain. Keep your essential tools organized and within easy reach to maintain efficiency throughout the cleaning process.
Choose the Perfect Weather and Time of Day
With your tools and safety equipment ready, selecting the right weather conditions becomes your next priority. You'll want to choose a time when ideal humidity and sunlight exposure won't interfere with your window cleaning efforts.
Proper timing and weather conditions are essential for achieving spotless windows – preparation is just as important as technique.
- Clean windows on an overcast day to prevent cleaning solution from drying too quickly and leaving streaks
- Start early in the morning or late afternoon to avoid direct sunlight that can create glare and make it difficult to spot dirt
- Skip cleaning when humidity levels are above 70%, as excessive moisture slows drying and attracts dust
- Choose a windless day to prevent cleaning solution from blowing onto freshly cleaned areas
Remember that mild temperatures between 60-70°F provide the best conditions for achieving crystal-clear results without fighting against weather-related challenges.
Remove Loose Debris and Cobwebs
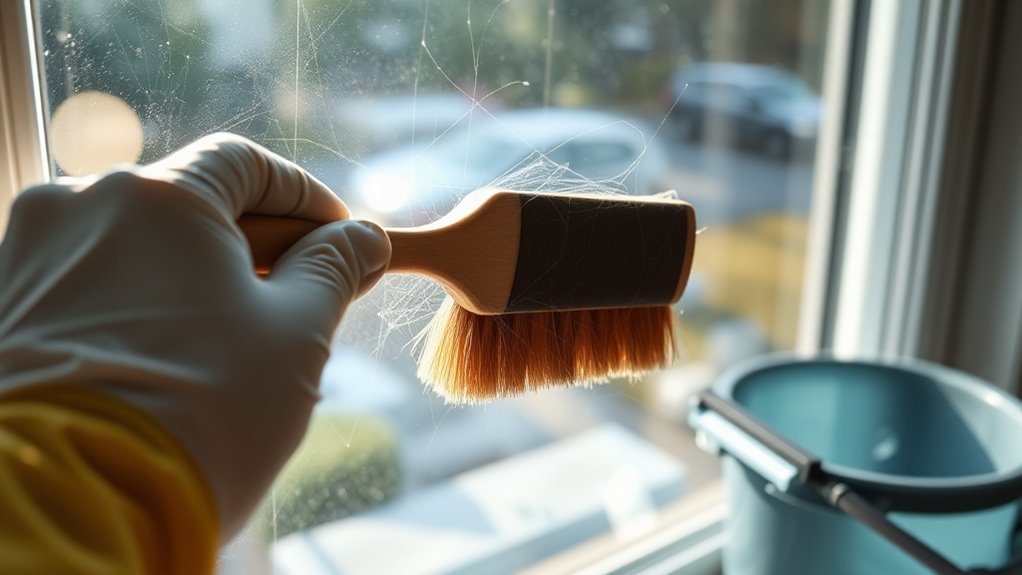
Start your window cleaning by using a long-handled brush to sweep away loose dirt and leaves from the window's surface and surrounding areas. You'll need to thoroughly clean the window tracks, removing accumulated debris that can interfere with proper window operation. Ultimately, clear away any cobwebs from corners and edges using your brush or a cobweb duster, paying special attention to those stubborn spider webs that often collect in window frames.
Use Long-Handled Brush First
Grabbing your long-handled brush, sweep away loose debris and cobwebs from the window's surface before applying any cleaning solution. The long-handled benefits include reaching high windows safely while keeping your feet on the ground. Choose from a variety of brush types designed specifically for outdoor window cleaning.
- Use a telescoping pole that extends up to 20 feet for maximum reach and versatility
- Select soft-bristled brushes to prevent scratching the glass surface
- Opt for brushes with built-in squeegee attachments for dual functionality
- Consider angled brush heads to access difficult corners and edges
You'll find that proper brush selection and thorough pre-cleaning considerably reduces your total cleaning time and improves the final results. Remember to work systematically from top to bottom, ensuring you don't miss any spots.
Clean Window Track Areas
After addressing the window's main surface, your attention should turn to the window tracks – those often neglected areas where dirt, dead insects, and debris accumulate over time.
For effective window track maintenance, you'll need a vacuum with a narrow attachment or a small brush to remove loose particles. Start by dislodging cobwebs from the corners using your brush, then work systematically along the track's length. Don't forget the small weep holes – these drainage channels must remain clear to prevent water damage.
If you encounter stubborn grime, spray a cleaning solution into the tracks and let it sit for a few minutes. Use cleaning tools like a dry toothbrush or cotton swabs to reach tight spaces. Finish by wiping the tracks with a microfiber cloth to guarantee they're completely dry and debris-free.
Clear Spider Web Corners
Cobwebs and debris collecting in window corners along with create an unsightly appearance but can also attract more spiders and insects over time. Effective spider web removal requires the right tools and techniques for thorough outdoor cleaning of these pesky corner dwellers.
- Use a soft-bristled extension duster or vacuum attachment to reach high corners and remove loose webs without damaging window surfaces
- Apply a natural deterrent spray made from essential oils like peppermint or citrus around window frames to discourage new web formation
- Wipe corners with a microfiber cloth dampened with white vinegar solution to dissolve stubborn web residue
- Clear surrounding vegetation and treat window frames with silicone-based spray to create a surface that's less appealing for web attachment
Regular maintenance of these areas will help prevent future web accumulation and keep your windows looking pristine.
Mix Your Professional-Grade Cleaning Solution

Professional window cleaners rely on three core ingredients to create their highly effective cleaning solution: dishwashing liquid, white vinegar, and warm water. For best results, fill a 2-gallon bucket with warm water, then add 2 tablespoons of dishwashing liquid and 1/2 cup of white vinegar.
While there are different cleaning solution types available commercially, this expert-tested mixture cuts through dirt, grime, and mineral deposits without leaving streaks. You'll want to mix fresh solution for each cleaning session, as letting it sit reduces its effectiveness. For tough stains, you can increase the vinegar ratio slightly, but don't overdo it—too much soap or vinegar will leave residue. These expert tips guarantee you're using the right concentration: the solution should feel slick but not overly soapy when you rub it between your fingers.
Master the S-Pattern Cleaning Technique
The S-pattern technique revolutionizes how you'll clean outdoor windows, guaranteeing streak-free results while saving time and effort. This effective cleaning method prevents you from missing spots or creating streaks that often occur with circular motions.
- Start at the top left corner of your window and move your squeegee in a continuous S pattern, working from left to right
- Keep your squeegee blade at a 45-degree angle against the glass surface
- Apply consistent pressure throughout the movement to guarantee even cleaning
- Wipe your squeegee blade clean with a microfiber cloth after each complete S pattern
Remember to overlap your strokes slightly as you move down the window. This systematic approach ensures professional-level results and makes the task more efficient than traditional back-and-forth or circular cleaning methods.
Perfect the Squeegee Method
While mastering the S-pattern forms your foundation, perfecting your squeegee technique will improve your window cleaning to a professional level. Start at the top corner of your window and maintain a 45-degree angle with your squeegee. Apply firm, consistent pressure as you move horizontally across the glass.
After each stroke, wipe your squeegee blade with a lint-free cloth to prevent window streaks from forming. When you reach the end of a stroke, use a quick hook motion to prevent drips. Work your way down the window, overlapping each stroke by about an inch to guarantee complete coverage. For tall windows, use an extension pole and maintain the same precise squeegee techniques. You'll notice a significant improvement in clarity and efficiency compared to traditional wiping methods.
Apply Finishing Touches and Preventive Care
Now that you've mastered the squeegee technique, your windows need those final touches to achieve a spotless finish. Use a clean, lint-free microfiber cloth to dry any remaining water droplets along the edges and corners of your windows. These finishing touches make the difference between good and exceptional results.
For long-lasting cleanliness and preventive maintenance, follow these essential steps:
- Apply a water-repellent coating to create a protective barrier against dirt and rain
- Install window screens to minimize debris accumulation
- Trim nearby bushes and trees to reduce pollen and leaf buildup
- Schedule quarterly cleanings to prevent stubborn stains and mineral deposits
Remember to inspect your windows monthly for signs of damage or wear. Early detection helps prevent costly repairs and maintains your windows' pristine appearance year-round.
Frequently Asked Questions
How Often Should Outdoor Windows Be Professionally Cleaned?
Frequency recommendations for professional outdoor window cleaning typically depend on your location and environment. You'll want to schedule cleanings at least twice a year during seasonal changes, usually in spring and fall. If you live in areas with heavy pollution, near construction, or close to the coast, you'll need more frequent cleanings—about every three to four months. Regular seasonal cleaning helps maintain visibility and protect your windows from environmental damage.
Can I Use the Same Cleaning Method for Tinted Outdoor Windows?
You'll need to use special care when cleaning tinted outdoor windows to avoid damaging the film. Don't use ammonia-based or abrasive cleaning solutions, as these can deteriorate the tinting. Instead, opt for a mild soap and water mixture or specific tinted window care products. Always use a soft microfiber cloth and gentle pressure when wiping. Start at the top and work down, ensuring you don't let the cleaning solution sit too long on the surface.
What Should I Do About Stubborn Mineral Deposits on Outdoor Windows?
For stubborn mineral deposits on your windows, you'll need a stronger approach than regular cleaning. Create a 50/50 vinegar solution with warm water and apply it directly to the affected areas. Let it sit for 5-10 minutes to break down the deposits. For particularly tough spots, make a paste using baking soda and water. Gently scrub with a non-abrasive sponge, then rinse thoroughly. Don't let the solution dry on the glass.
How Do I Safely Clean Second-Story Windows From the Ground?
You'll need specialized cleaning tools designed for high windows: a telescoping pole with interchangeable attachments like squeegees, microfiber cloths, and sponges. Always maintain three points of contact with the ground for stability, and don't overextend your reach. For safety precautions, avoid cleaning in windy conditions, keep electrical wires in mind, and work on a dry, level surface. If windows are too high, it's best to hire professionals.
Are Pressure Washers Safe to Use on Outdoor Window Cleaning?
While pressure washers can clean outdoor windows, you'll need to be extremely careful with their use. Don't use high-pressure settings, as they can damage window seals, crack glass, or force water behind frames. If you're committed to using a pressure washer, stick to low-pressure settings (under 2000 PSI) and maintain a safe distance of at least 4 feet. It's often safer to use extension poles with traditional cleaning methods instead.