You’ll prevent frozen outdoor water pipes by installing foam insulation sleeves around exposed pipes, wrapping them with heat tape, and implementing a steady drip system at vulnerable faucets. Drain and shut off outdoor systems completely, construct insulated boxes around exposed pipes, add temporary newspaper wrapping for quick protection, and install smart temperature sensors for monitoring. These proven methods work together to create an all-encompassing freeze-prevention system that you’ll master with the right approach.
Install Foam Pipe Insulation Sleeves
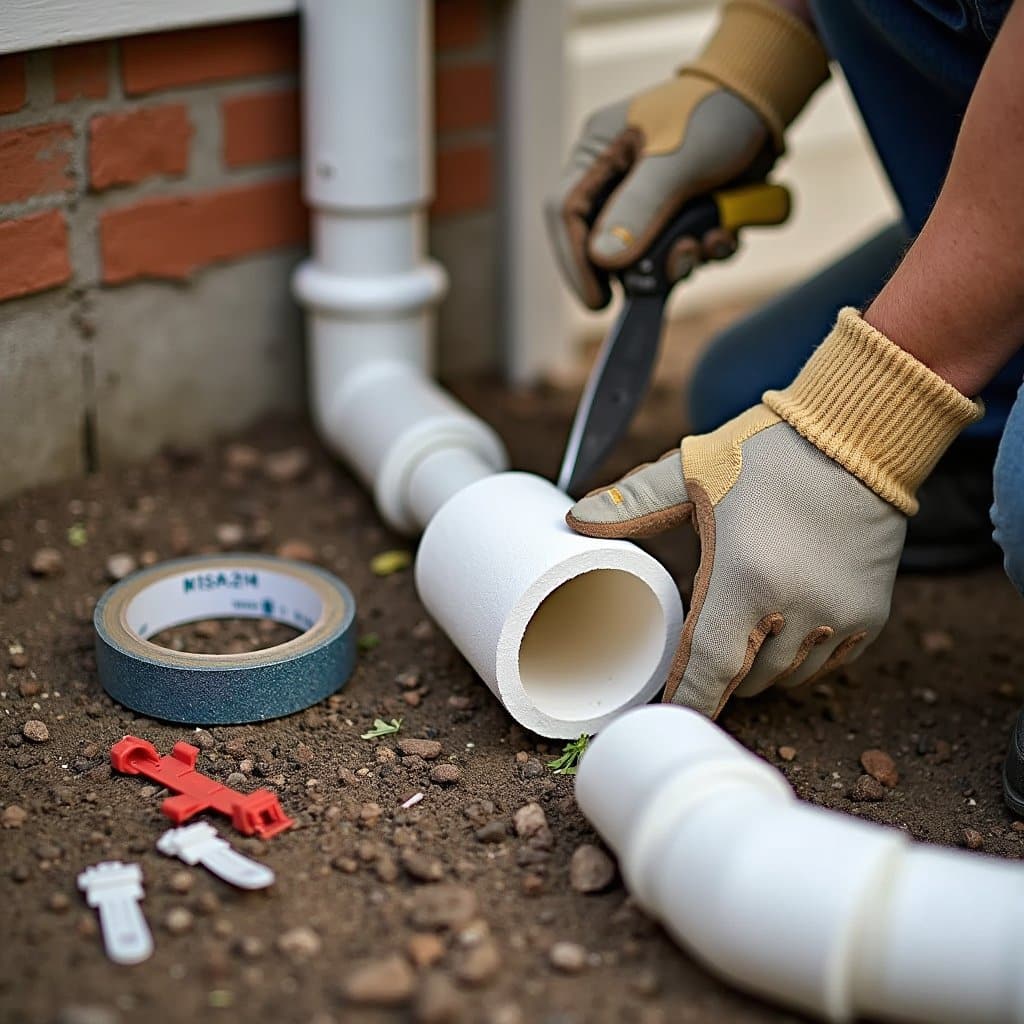
When temperatures drop below freezing, foam pipe insulation sleeves offer a cost-effective primary line of defense against frozen outdoor water pipes. You’ll find two main foam types available: polyethylene and rubber foam, with the former being more common and budget-friendly for residential use.
To guarantee proper installation techniques, measure your pipe’s outer diameter initially, then select sleeves that match this measurement exactly. Cut the foam sleeves lengthwise using a utility knife, then wrap them around your pipes, confirming all surfaces are covered. Secure the seams with weatherproof tape every 12 inches, and use cable ties at the ends for supplementary stability. Don’t forget to insulate all joints, valves, and elbows using specialized foam fitting covers. Seal any gaps where pipes enter your home’s foundation to prevent cold air infiltration.
Wrap Pipes With Heat Tape or Cable
To properly install heat tape or cable, you’ll need to initially attach it in a straight line along the pipe’s bottom, securing it with electrical tape every few feet. You’ll then connect the heating element to a nearby GFCI-protected outlet, ensuring the power cord doesn’t cross or overlap with the heating section. For maximum effectiveness, wrap fiberglass insulation over the heat tape and seal all connections with weatherproof electrical tape.
Step-by-Step Installation Tips
Before installing heat tape or cable, carefully inspect your outdoor pipes to determine the total length needed and identify accessible power outlets within reach. Measure each pipe section requiring protection and add 10% extra length to account for wrapping around valves and joints.
Clean the pipes thoroughly and remove any old pipe insulation or debris. Starting at the power outlet end, secure one end of the heat tape and wrap it in a spiral pattern, maintaining consistent spacing as specified in the manufacturer’s instructions. Don’t overlap the tape, as this can cause overheating. Secure the tape with electrical tape or manufacturer-provided fasteners every few feet.
Complete your winter preparation by covering the heat tape with foam pipe insulation, ensuring all seams are sealed with weatherproof tape. Test the system before temperatures drop below freezing.
Proper Power Connection Methods
Since proper electrical connections are essential for heat tape safety and functionality, you’ll need to follow specific power connection protocols. Verify your power sources are GFCI-protected outdoor outlets located within reach of the heat tape’s power cord. Don’t use extension cords, as they can compromise electrical safety and void warranties.
Connect the heat tape’s plug directly to the outlet, making sure it’s completely inserted and secured. You’ll want to verify that the connection point remains dry by installing a weatherproof cover over the outlet. If your heat tape includes a thermostat, position it so it accurately reads the ambient temperature. Test the connection by turning on the power and confirming the indicator light illuminates, signaling proper operation of your freeze protection system.
Drain and Shut Off Outdoor Water Systems
You’ll need to locate your home’s main water shutoff valve before winter weather arrives, typically found near where the main water line enters your house. Remove and empty all garden hoses connected to your outdoor spigots to prevent water from freezing and causing damage. Once you’ve drained the hoses, store them in a dry location to protect them from harsh winter conditions.
Locate Main Shutoff Valve
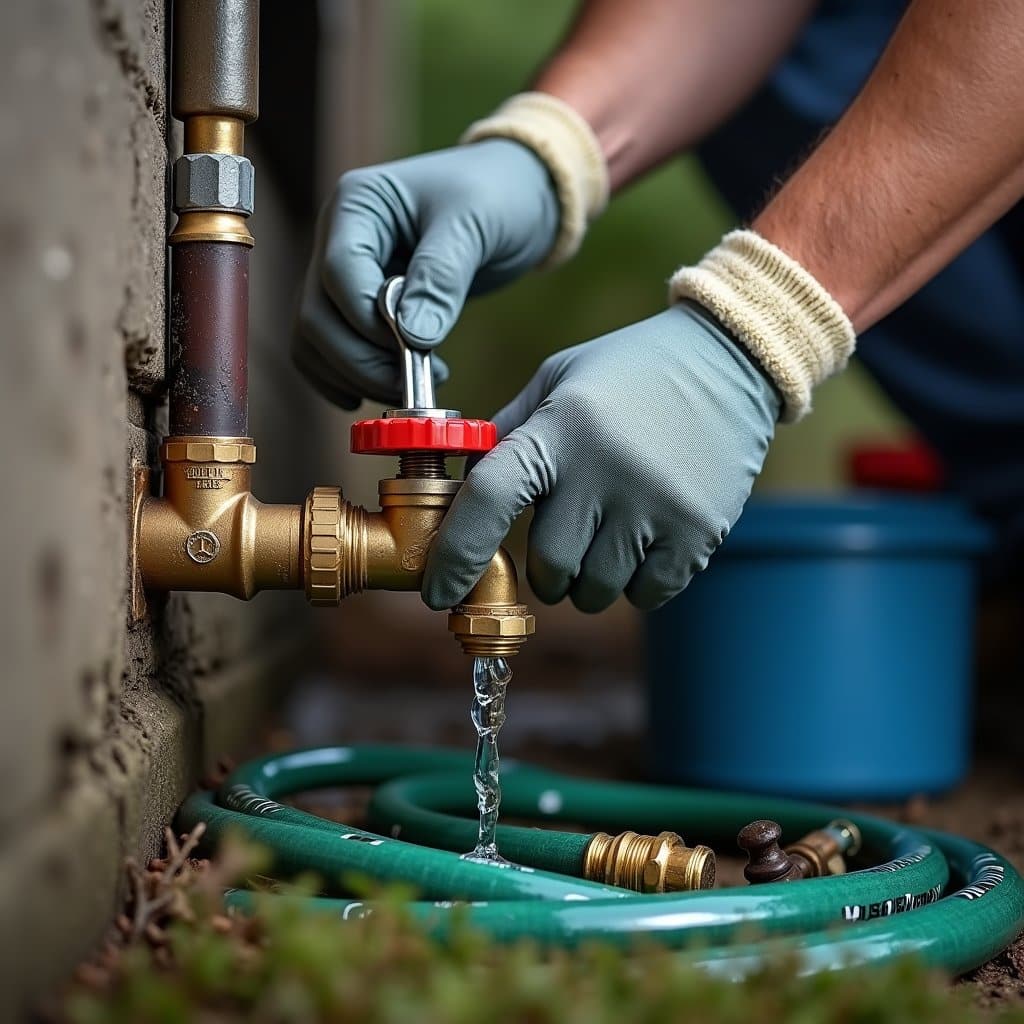
Locating your home’s main water shutoff valve marks the initial critical step in protecting outdoor pipes from winter freezing. You’ll typically find the main valve location in your basement, crawl space, or utility room, positioned where the main water line enters your house from the street. In homes with basements, look along the front foundation wall. For slab foundations, check near your water heater or under the kitchen sink.
Once you’ve identified the valve, test it by turning it clockwise to verify it’s functioning properly. Regular valve maintenance includes lubricating the stem and checking for corrosion or mineral buildup. If you find the valve is stuck or leaking, contact a plumber immediately to replace it before winter arrives. Mark the valve’s location clearly and keep necessary tools nearby for quick access during emergencies.
Empty Connected Garden Hoses
After securing your main water valve, the next protective measure focuses on your outdoor garden hoses and water systems. Proper hose maintenance requires you to disconnect all garden hoses from their spigots before winter arrives. Once disconnected, lift each hose and allow water to drain completely from both ends. You’ll want to store your hoses in a garage or shed after they’re fully drained.
As part of your winterization tips, don’t forget to drain the water from frost-free hose bibs and irrigation systems. Even these specialized fixtures can freeze if water remains trapped inside. Remove any splitters, timers, or attachments from outdoor faucets, as these accessories can retain water and cause damage when temperatures drop below freezing. Ultimately, install insulated covers over exposed spigots for added protection.
Create a Drip System for Faucets
Opening indoor and outdoor faucets to create a steady drip serves as one of the most effective defenses against frozen pipes during severe cold spells. You’ll want to maintain a continuous drip that’s about the thickness of a pencil lead. This small flow prevents pressure buildup and keeps water moving through your pipes, considerably reducing freeze risks.
For ideal faucet maintenance, identify the fixtures furthest from your main water supply and set up your drip irrigation at these points. You’ll need to keep both hot and cold water lines trickling. Calculate approximately 5 drops per minute per faucet this provides sufficient movement while conserving water. Remember to direct the dripping water into a drain or catch basin to prevent ice accumulation around your foundation.
Build an Insulated Pipe Box
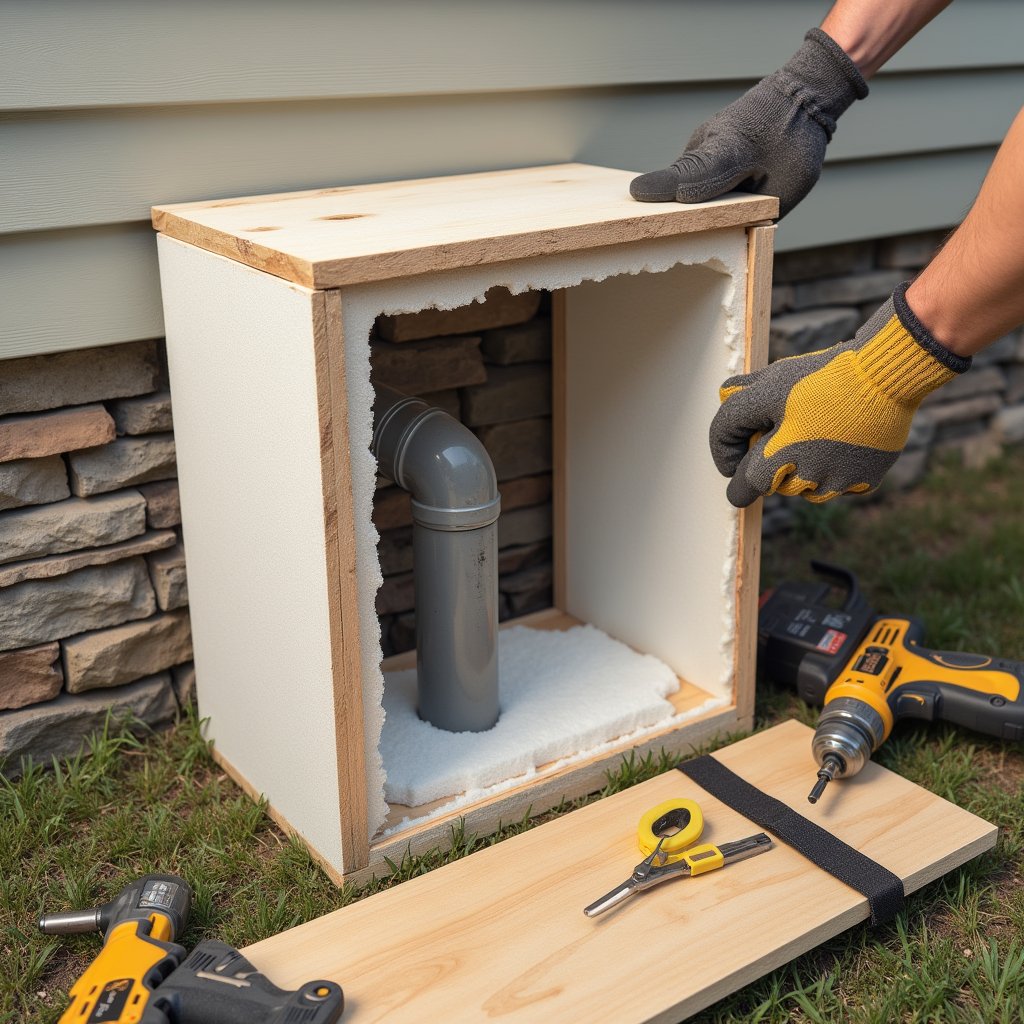
While drip systems offer immediate protection, a well-constructed insulated pipe box provides long-term defense against freezing temperatures. You’ll need to create a custom enclosure that surrounds your exposed pipes using insulated materials like rigid foam boards or plywood lined with fiberglass insulation.
Consider these essential elements when building your box designs:
- Install a hinged lid for easy access during maintenance and repairs
- Create a minimum 2-inch gap between the pipe and box walls for proper insulation coverage
- Add weatherstripping around edges to prevent cold air infiltration
- Include small drainage holes at the base to prevent moisture buildup
Position your box to shield pipes from prevailing winds and guarantee it’s properly sealed. For maximum effectiveness, wrap pipes with heat tape before enclosing them in your insulated structure.
Add Extra Protection With Newspaper Wrapping
When temperatures drop unexpectedly, newspapers provide an effective emergency insulation layer for exposed outdoor pipes. You’ll need several sheets of newspaper and waterproof tape for this winter preparation method. Start by wrapping multiple layers of newspaper around the pipe, ensuring each layer overlaps the previous one by at least an inch. Press the newspaper firmly against the pipe’s surface to eliminate air pockets.
Secure the newspaper insulation with waterproof tape at both ends and at 6-inch intervals along the pipe. For maximum protection, wrap at least 10 layers of newspaper, particularly around joints and valves where freezing often begins. While this method isn’t a permanent solution, it’s an excellent temporary measure until you can install proper pipe insulation or when other materials aren’t immediately available.
Monitor Temperature With Smart Sensors
Smart temperature sensors offer a significant upgrade from traditional pipe protection methods like newspaper wrapping. You can install these devices directly on your outdoor pipes to monitor temperatures in real-time and receive instant alerts when conditions become dangerous.
Modern smart sensors provide 24/7 pipe monitoring and instant freeze alerts, surpassing old-fashioned methods like wrapping pipes in newspaper.
Several smart sensor types are available to protect your plumbing:
- Wireless pipe monitors that connect to your smartphone and send temperature alerts
- Smart water valve sensors that automatically shut off flow when freezing is detected
- External pipe-mounted probes with continuous temperature logging capabilities
- WiFi-enabled smart thermometers that track multiple pipe zones simultaneously
Position sensors at critical points where pipes are most vulnerable to freezing, such as northern exposures and uninsulated sections. Most modern sensors operate on batteries or low-voltage power, making installation straightforward without requiring an electrician.
Frequently Asked Questions
How Long Does Pipe Insulation Typically Last Before Needing Replacement?
Your pipe insulation lifespan depends heavily on the insulation material types you’ve installed. Foam insulation typically lasts 5-10 years, while fiberglass can extend to 10-15 years. You’ll get the longest life from polyethylene and rubber materials, which can last 15-20 years if properly maintained. However, you’ll need to replace any insulation sooner if you notice signs of water damage, cracking, or compression that reduces its effectiveness.
What’s the Average Cost Difference Between Heat Tape and Traditional Pipe Insulation?
You’ll find heat tape costs considerably more upfront, typically ranging from $0.50 to $2 per foot, plus electricity costs of $40-100 annually. In contrast, traditional foam pipe insulation runs about $0.25-0.50 per foot with no ongoing expenses. During installation, you’ll need to factor in that heat tape requires an electrical outlet and careful spacing, while foam insulation simply wraps around your pipes with minimal installation requirements.
Can Outdoor Pipes Freeze if the Indoor Temperature Remains Above Freezing?
Yes, your outdoor pipes can freeze even if your indoor temperature stays above freezing. That’s because outdoor pipes are exposed to external temperature fluctuations and aren’t benefiting from your home’s indoor humidity and heat. Keep in mind that water freezes at 32°F (0°C), and outdoor temperatures often drop well below this threshold at night, even when your indoor spaces remain warm. You’ll need dedicated pipe protection methods for any plumbing exposed to outdoor conditions.
At What Temperature Should I Start Implementing Freeze Prevention Measures?
You’ll want to start implementing freeze prevention measures when overnight temperatures approach 32°F (0°C). However, don’t wait until it hits freezing – start protecting your pipes when forecasts predict temperatures of 35°F (2°C) or lower. Wind chill can accelerate freezing, so factor this into your temperature thresholds. For exposed pipes, you should be especially vigilant, as they’ll freeze more quickly than those with some environmental protection.
How Do I Identify Which Outdoor Pipes Are Most Vulnerable to Freezing?
You’ll find the most vulnerable outdoor pipes in uninsulated areas exposed to cold winds and shade. Check metal pipes initially, as copper and galvanized steel conduct cold more readily than PVC or PEX. Look for pipes that run along exterior walls, cross through unheated spaces, or sit in crawl spaces. Early frozen pipe symptoms include reduced water flow, strange odors, or frost buildup on pipe surfaces. These warning signs demand immediate attention.