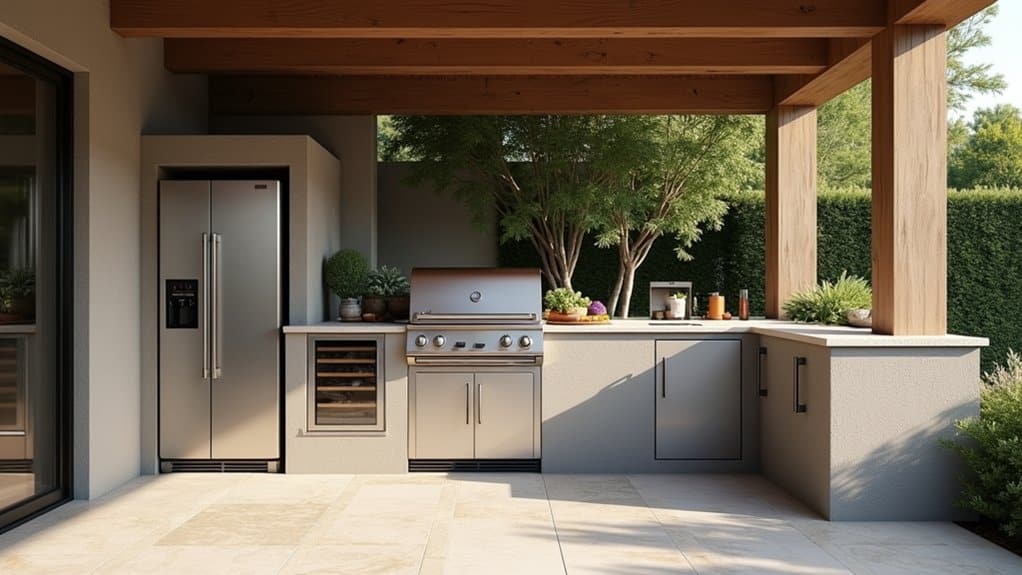
You’ll build outdoor kitchen cabinets by first constructing a pressure-treated 2×4 frame with notched corner posts, then sheathing it with 3/4-inch plywood attached using construction adhesive and deck screws. Next, you’ll waterproof the structure with overlapping builder’s felt, wire lath, and scratch coat mortar. After that, set your cabinet boxes on level ground with adjustable feet. Finally, run your electrical, gas, and plumbing lines with proper shut-offs. Each step below breaks down the exact techniques you’ll need.
Build the 2×4 Frame for Your Outdoor Cabinets
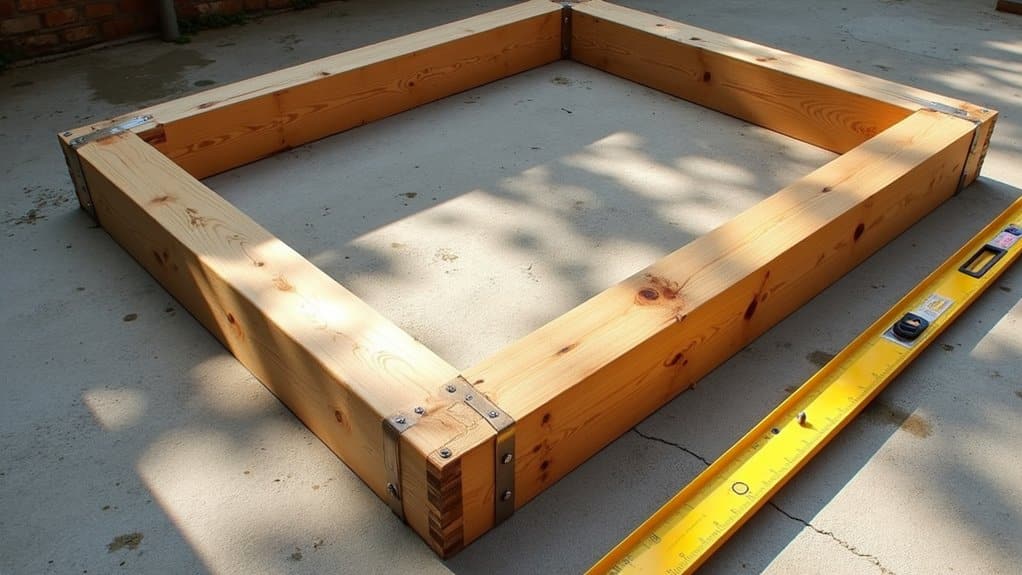
A sturdy 2×4 frame forms the backbone of your outdoor kitchen cabinets, so you’ll want to start with pressure-treated lumber that can withstand moisture, temperature swings, and UV exposure. Select straight studs and pay attention to wood grain orientation, position the grain to resist warping from outdoor elements. Finding quality straight boards may require an hour of searching through the lumber section at your home improvement store.
Cut your corner posts to counter height minus the countertop thickness. You’ll need four 32-inch main legs. Screw 2×4s together in pairs using 2½-inch deck screws, then notch the top and bottom of each post 1½ inches deep by 3½ inches high. Taking on this construction yourself can save 20-40% in labor fees compared to hiring a contractor.
Corner post adjustments guarantee proper alignment. Center 25-inch leg supports on each 32-inch post. Remember that actual 2×4 dimensions measure 1.5 by 3.5 inches when calculating your cuts. Since wood is combustible, you’ll need to plan for a fire-resistant countertop if you’re installing a grill in your outdoor kitchen.
Sheath the Frame and Cut Cabinet Openings
Once your 2×4 frame stands solid, you’ll sheath it with ¾-inch plywood panels cut to match each section’s dimensions. Before attaching panels, screw three boxes together side by side, then flip the frame to install metal post standoffs on post bottoms.
Apply construction adhesive along posts and stretchers, then lay plywood over the bead. Drive 2-inch deck screws every 6 inches vertically and 12-15 inches horizontally, hitting framing members. Overlap seams by a couple inches for continuous coverage. Consider sealing plywood panels with pressure-treated or MDO alternatives for water resistance. If you’re working with galvanized steel studs instead of wood framing, use self-tapping screws designed for metal to secure your sheathing panels.
Cut openings to match your planned cabinet, grill, sink, and drawer placements. Build temporary wood frames to maintain opening integrity during construction. Focus on reinforcing longer spans near appliances with lateral supports. Remember that proper framing must be level and plumb to ensure your countertops and finishes install correctly without gaps or misalignment. Use epoxy to seal plywood edges where cuts expose the core material to prevent moisture from infiltrating and causing delamination over time.
Waterproof With Felt, Lath, and Scratch Coat
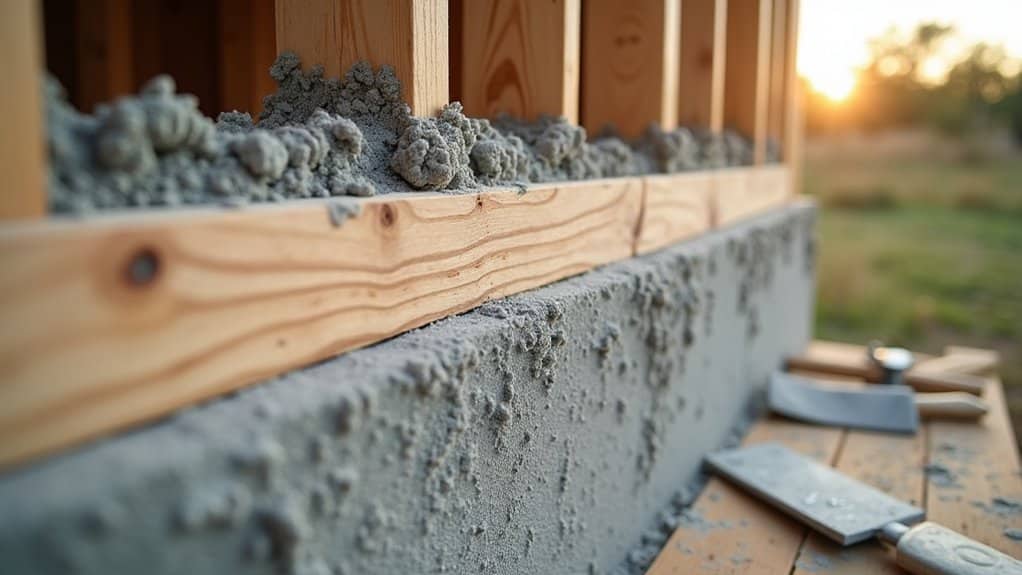
Before stone or stucco goes on, you’ll need to waterproof the plywood sheathing with a three-layer system of builder’s felt, wire lath, and scratch coat mortar. Start your moisture barrier installation by stapling felt from the bottom up, overlapping sheets by two inches for proper drainage.
| Component | Installation Detail |
|---|---|
| Builder’s Felt | Overlap 2 inches, work bottom to top |
| Wire Lath | Nail every 6″ vertical, 12-15″ horizontal |
| Scratch Coat | Cure 24 hours after scoring |
For proper lath framework, position honeycombs outward with wires facing up. Use stainless-steel roofing nails, hitting framing whenever possible. Apply mortar in downward strokes, then score horizontal lines as guides for stone placement. This multi-step process requires patience, as scratch coat alone needs a full 24-hour cure time before you can proceed with durable, easy-clean cabinetry alternatives. Alternatively, you can skip this labor-intensive process by choosing pre-assembled outdoor kitchen cabinets made with waterproof HDPE box construction that eliminates the need for moisture barriers entirely.
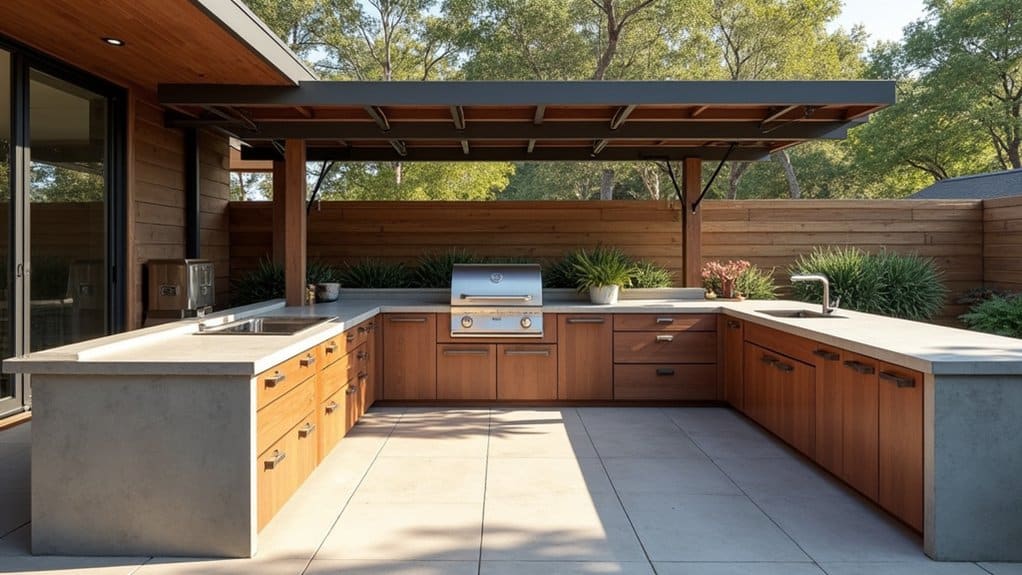
Set the Cabinet Boxes and Prep Door Flanges
With your scratch coat cured and scored, you’re ready to install the cabinet boxes that’ll house your grill, storage, and accessories.
Start by positioning your grill cabinet on the most level ground, maintaining a 4.5-inch minimum toe kick. Level the cabinets using a 4-foot level, checking plumb vertically and horizontally. Install adjustable leveling feet to achieve proper alignment across the entire installation. Begin leveling at the highest point of any sloping surface and work your way down.
To join the cabinets, partially install #10 screws in the easy-alignment holes on side flanges. Lift adjacent cabinets over screw heads through dog bone holes, then tighten once everything’s level.
Secure boxes to your base framing with 2-inch deck screws. For concrete block bases, drill 3/16-inch pilot holes for Tapcon anchors.
Finally, prep door flanges by installing adjustable vertical and horizontal rails, positioning them flush with your cutout openings. Ensure the horizontal rails are mounted on the vertical rails with both pieces level and mirroring each other on the front and back panels.
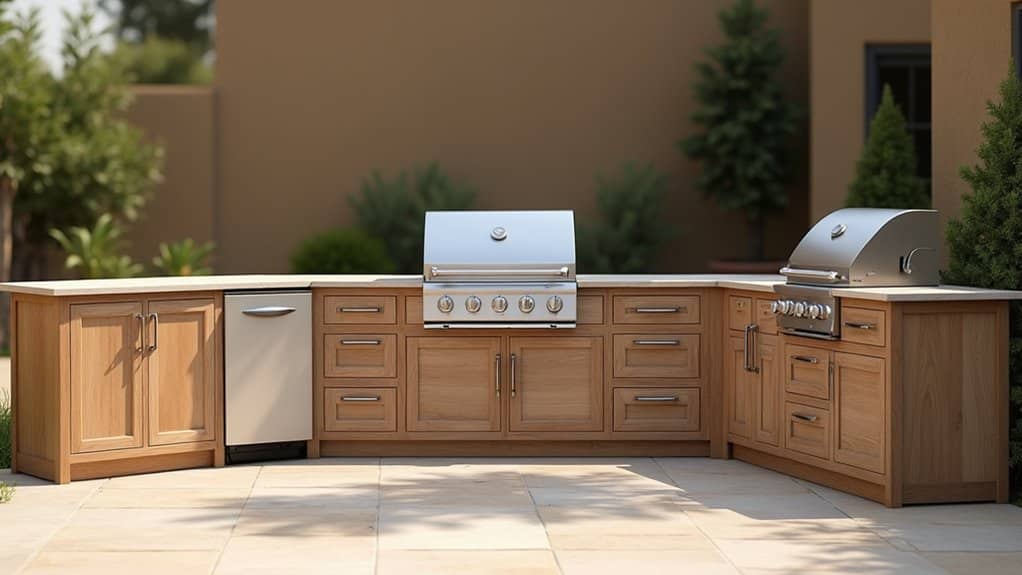
Run Electrical, Gas, and Plumbing Lines
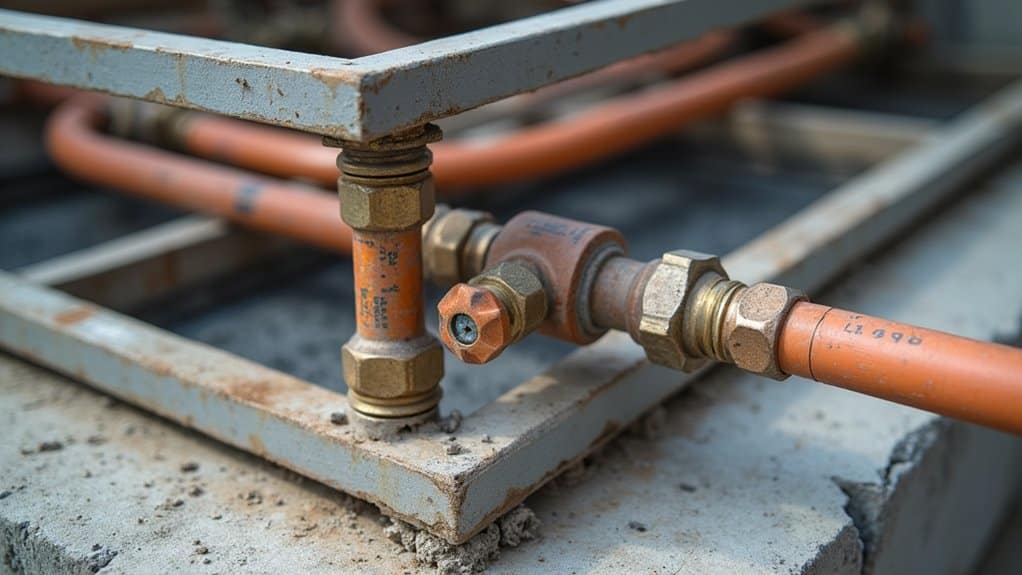
Because your cabinet boxes are now secured and door flanges prepped, you’ll need to run all utility lines before applying the finish coat. Coordinate meter upgrade timing with your gas provider if adding multiple appliances. Accommodate zoning permit requirements by scheduling inspections before concealing any lines.
Running utilities before the finish coat ensures proper inspections and keeps your outdoor kitchen project on track with local codes.
- Water supply: Extend hot and cold lines using PEX or copper, installing shut-off valves with drain plugs for winterization. Tap into your home’s existing water lines and extend the supply pipes through the house wall to reach your outdoor kitchen sink.
- Gas lines: Route from existing supply through basement or walls, adding manual shut-offs at the source and each appliance. Ensure proper sizing and pressure regulation for each appliance to prevent competition for gas between multiple features.
- Electrical: Run properly sized conductors through utility conduits to prevent voltage drop over long distances.
- Drainage: Connect sink drains to your home’s system with code-compliant venting.
Pressure test all gas connections before proceeding. Always hire licensed professionals to handle plumbing and electrical work to ensure safe and code-compliant installations.
Frequently Asked Questions
What Type of Wood Is Best for Outdoor Kitchen Cabinets in Humid Climates?
For humid climates, you’ll want HDPE (marine-grade polymer) as your top choice, it’s fully waterproof with zero water absorption, making it one of the best mold resistant materials available. Teak wood ranks second, offering natural oils that repel moisture effectively. If you prefer engineered options, marine-grade plywood provides excellent weather resistant finishes that prevent delamination. Each option delivers durability against humidity, but HDPE requires the least maintenance for long-term performance.
How Much Weight Can Outdoor Kitchen Cabinets Support on the Countertop?
Your outdoor kitchen cabinets’ weight capacity varies considerably based on construction materials. Standard stainless steel models support 450-630 lbs, while heavy-duty options like Challenger Kitchen Cabinets handle up to 700 lbs for stone countertop materials. Premium refrigeration cabinets can withstand 3,800 lbs total. You’ll want to verify your specific cabinet’s rating before installing granite or concrete countertops, as these heavier countertop materials demand reinforced 304 stainless steel or aircraft-grade aluminum frames for reliable support.
Do Outdoor Kitchen Cabinets Require Building Permits in Residential Areas?
Whether you need permits depends on your project’s complexity. Basic freestanding cabinets without utility connections typically don’t require permits, but built-in installations with electrical, plumbing, or gas hook-ups must meet local building code requirements. Attached structures like pergolas also trigger permitting needs. You’ll want to contact your municipal building department to understand the permit application process before starting work. Skipping this step risks fines, stop-work orders, or mandatory removal of completed installations.
How Long Will Outdoor Kitchen Cabinets Last Before Needing Replacement?
Your outdoor kitchen cabinets will last 15-25+ years depending on material choice. HDPE cabinets deliver 25+ years with zero maintenance schedule requirements, while 316 marine-grade stainless steel offers 20-25 years when you apply proper weatherproofing techniques. Teak cabinets achieve 15-20 years but demand annual oil treatments. Powder-coated aluminum provides 15-20 years with periodic touch-ups every 5-7 years. You’ll maximize lifespan by selecting materials suited to your specific climate conditions.
Can Outdoor Kitchen Cabinets Be Built on a Concrete Patio Surface?
Yes, you can build outdoor kitchen cabinets directly on a concrete patio surface. When addressing concrete patio installation considerations, you’ll need to verify the slab’s structural integrity and level any slopes using metal post standoffs as feet. Moisture resistant cabinet designs are essential, use cement board sheathing positioned ¼ to ½ inch above the surface for proper drainage. Secure your frames with construction adhesive and 2½-inch deck screws for lasting stability.