To treat wood for outdoor use, start by cleaning the surface with a commercial wood cleaner and stiff brush. Sand progressively with coarse to fine-grit sandpaper, following the grain. Check weather conditions, confirming temperatures between 50-90°F. Apply wood preservative evenly, then select and apply a compatible sealant. Add multiple protective topcoat layers, waiting 24-48 hours between coats. Maintain your treated wood with regular inspections and reapplication every 2-3 years. A deeper understanding of each step guarantees ideal protection and longevity.
Cleaning and Preparing the Wood Surface
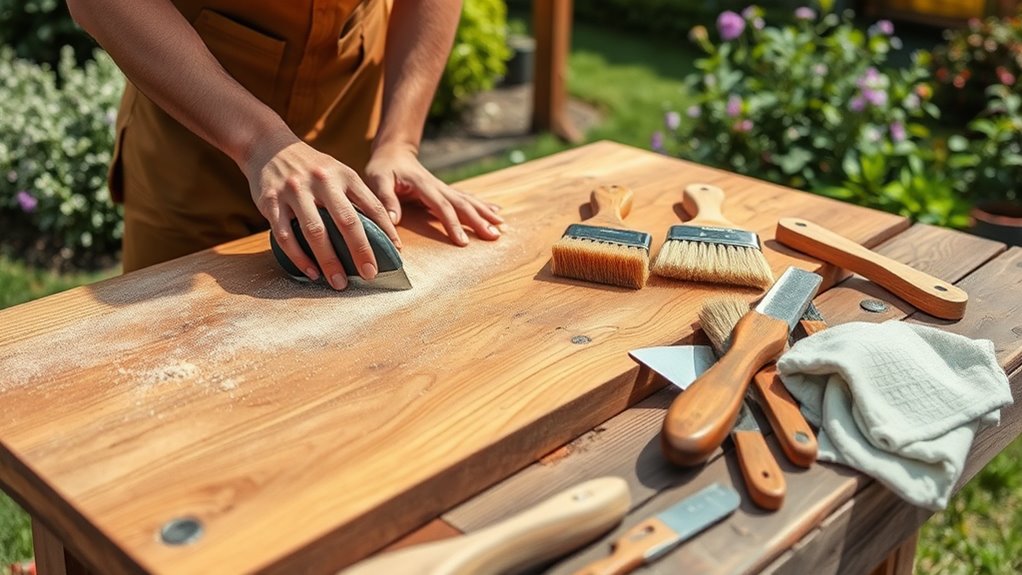
Before applying any wood treatment, thoroughly clean and inspect the wood surface to remove contaminants, debris, and previous finishes. Use a stiff brush and commercial wood cleaning solution to scrub away dirt, mildew, and weathered gray wood fibers. For stubborn stains, apply oxygen bleach and let it sit for 15 minutes before rinsing.
After surface cleaning, allow the wood to dry completely for 24-48 hours, depending on humidity levels. Test the moisture content using a moisture meter it should read below 15% before proceeding. Sand any rough spots with medium-grit sandpaper, followed by fine-grit for ideal surface preparation. Remove all sanding dust with a tack cloth or vacuum. If you’re working with new wood, lightly sand to open the pores for better treatment absorption.
Sanding and Smoothing Your Wood
Select sandpaper grits progressively, starting with coarse (60-80) for rough surfaces and moving to medium (120-150) and fine (220+) for ideal smoothness. You’ll want to sand in the direction of the wood grain using consistent, even pressure to avoid creating scratches or uneven areas. Keep your sanding strokes fluid and overlapping, checking the surface frequently with your hand to verify you’re achieving uniform smoothness across the entire piece.
Choose Right Sandpaper Grit
When sanding outdoor wood, choosing the correct grit sequence guarantees excellent surface preparation for protective treatments. Start with coarse-grit sandpaper to remove major imperfections, then progressively move to finer grits for a smooth finish. Different sandpaper types, from aluminum oxide to silicon carbide, offer varying levels of effectiveness on outdoor woods.
For best grit comparison and progression, follow this sequence:
- Begin with 60-80 grit for rough surfaces and removing old finishes
- Progress to 120-150 grit for intermediate smoothing
- Finish with 220 grit for final surface preparation
You’ll know you’re ready to move to a finer grit when you’ve eliminated the scratches from the previous grade. Don’t skip more than one grit level between steps, as this guarantees uniform surface preparation.
Sand With Proper Technique
Proper sanding technique greatly impacts the quality of your outdoor wood preparation. Move the sander parallel to the wood grain using consistent, steady pressure. Don’t let the sander rest in one spot, as this can create unwanted dips and gouges.
Start with your coarsest grit selection and systematically work through progressively finer grits. Make complete passes across the entire surface before switching to the next grit. Keep the sander flat against the wood, and overlap each pass by about 50% to guarantee uniform coverage.
For edges and corners, reduce pressure slightly to prevent rounding. Vacuum between grits to remove dust and check your progress regularly with good lighting. You’ll know you’re done when the surface feels smooth and shows no visible scratches from previous grits.
Checking Weather Conditions Before Treatment

You’ll need to apply wood treatments when temperatures remain between 50-90°F (10-32°C) for ideal absorption and curing. Keep a close eye on weather forecasts, ensuring at least 24-48 hours of dry conditions after application to prevent rain from washing away or diluting your treatment. If you’re working outdoors, consider using temporary shelter or tarps to shield your project from unexpected precipitation during the treatment process.
Ideal Temperature Ranges
Temperature control plays an essential role in successful wood treatment application. You’ll need to monitor temperature fluctuations and consider seasonal considerations to achieve ideal results. The ideal temperature range for treating wood falls between 50°F and 90°F (10°C to 32°C).
For best results, maintain these temperature parameters:
- Keep ambient temperature above 50°F (10°C) during application and for at least 24 hours after
- Don’t apply treatment when temperatures exceed 90°F (32°C), as this can cause rapid drying and poor penetration
- Verify wood surface temperature stays within 5-10 degrees of air temperature
If temperatures fall outside these ranges, you’ll risk improper absorption, extended drying times, or treatment failure. Schedule your project during moderate temperature periods, typically in spring or fall, to verify ideal treatment conditions.
Protection From Rain Exposure
While treating wood outdoors, checking weather forecasts is critical to prevent rain exposure during the application and curing process. You’ll need 24-48 hours of dry conditions to properly apply water resistant coatings and allow moisture barriers to cure effectively.
| Weather Condition | Impact on Treatment | Action Required |
|---|---|---|
| Rain Forecast | Compromises adhesion | Postpone treatment |
| High Humidity | Slows curing time | Add 12-24 hours |
| Clear Skies | Best conditions | Proceed as planned |
Monitor the forecast for at least three days after treatment to guarantee proper curing. If rain threatens unexpectedly during application, quickly cover your project with waterproof tarps. Keep in mind that rushing the treatment process during questionable weather can lead to coating failure and wasted materials. Always prioritize ideal conditions over meeting deadlines.
Applying Wood Preservative
Before beginning the application process, select a wood preservative that’s compatible with your lumber type and intended use. Common preservatives include copper-based treatments, oil-based sealants, and water-repellent preservatives, each offering distinct wood treatment benefits.
Apply the preservative using these proven steps:
- Clean the wood surface thoroughly and let it dry completely
- Use a brush, roller, or sprayer to apply the preservative in even strokes along the wood grain
- Allow each coat to penetrate for the manufacturer’s recommended time before applying subsequent layers
Ensure you’re working in a well-ventilated area and wearing appropriate protective gear. You’ll need to reapply preservative periodically, typically every 2-3 years, depending on weather exposure and preservative type. For ideal protection, treat all sides of the wood, including end grains.
Selecting and Using the Right Sealant
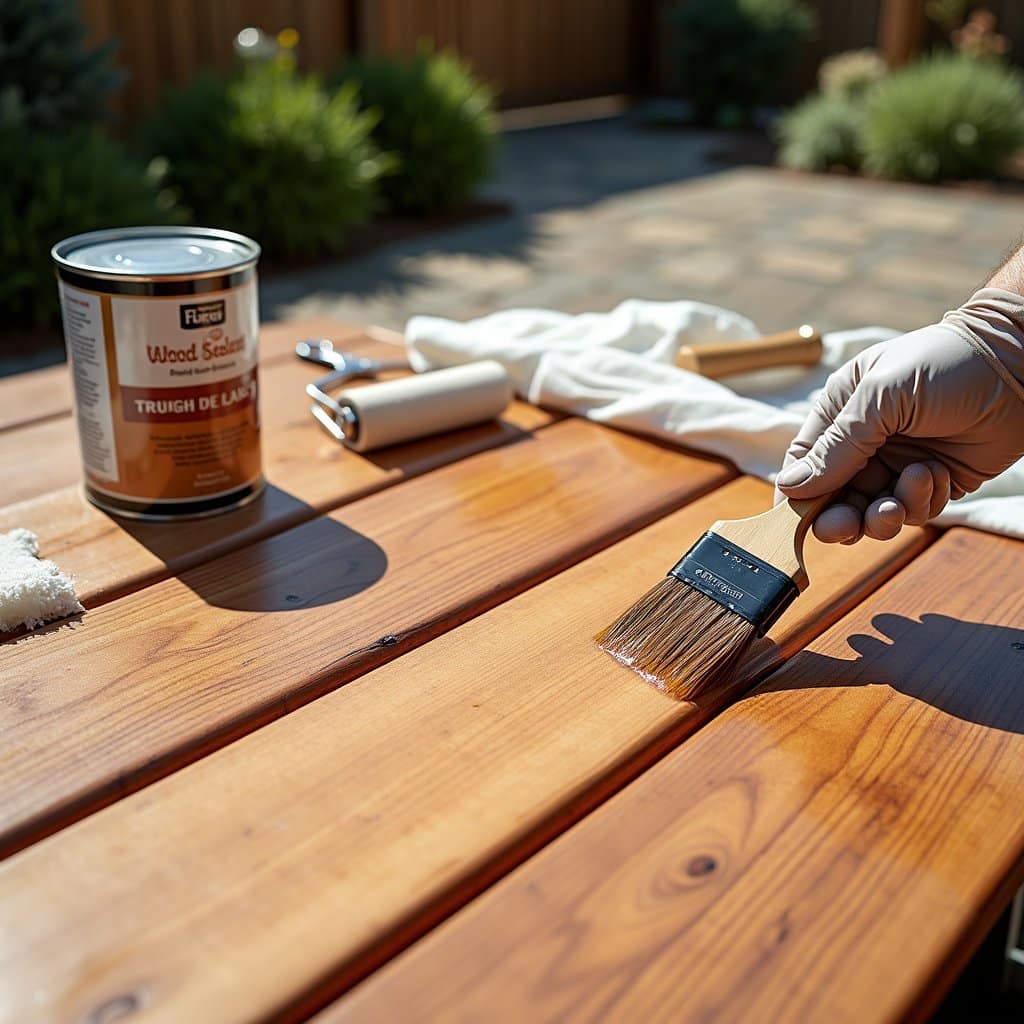
Since proper sealant selection greatly impacts the longevity of outdoor wood, you’ll need to choose a product that matches your specific environmental conditions and wood type. Consider oil-based or water-based sealants, with oil-based offering superior water resistance and water-based providing better UV protection.
Apply your chosen sealant using a brush, roller, or sprayer in even strokes following the wood grain. For vertical surfaces, work from top to bottom to prevent drips. You’ll achieve ideal results by applying two thin coats rather than one thick layer. Allow each coat to dry completely according to the manufacturer’s specifications, typically 24-48 hours. In high-moisture environments, select a sealant with added mildewcides. Test the sealant on a small, inconspicuous area initially to confirm compatibility and desired finish.
Adding Protective Topcoat Layers
After the sealant has fully cured, you’ll need to apply protective topcoat layers to improve your wood’s weather resistance and durability. Choose between water-based polyurethane, oil-based polyurethane, or marine-grade varnish as your topcoat types. Each option offers different levels of protection and finishing aesthetics.
When applying your chosen topcoat, follow these essential application techniques:
- Sand lightly between coats using 220-grit sandpaper to guarantee proper adhesion
- Apply thin, even coats using a high-quality brush or foam applicator
- Wait 24-48 hours between coats, depending on humidity and temperature
For maximum protection, apply at least three coats of your chosen topcoat. Maintain proper ventilation during application and verify the surface is dust-free before each coat. This creates a durable finish that’ll protect your wood from UV damage and moisture.
Maintaining Your Treated Wood
While proper initial treatment provides excellent protection, your outdoor wood requires regular maintenance to improve its service life. Conduct routine inspections every six months to identify potential issues early. Address any damage repair promptly to prevent moisture infiltration and decay.
| Maintenance Task | Frequency | Action Required |
|---|---|---|
| Visual Inspection | Bi-annual | Check for cracks, splits, rot |
| Surface Cleaning | Annual | Remove dirt, debris, mold |
| Resealing | 2-3 years | Apply new protective coat |
| Hardware Check | Annual | Tighten/replace fasteners |
| Damage Repair | As needed | Fill cracks, replace boards |
You’ll need to reapply protective treatments every 2-3 years, depending on exposure levels and wear. When you notice water no longer beading on the surface, it’s time to recoat. Remove any loose material and verify the surface is clean and dry before applying new treatment.
Frequently Asked Questions
How Long Should Treated Wood Dry Before Installing It in the Ground?
For ideal installation, you’ll need to let treated wood dry completely, which typically takes 24-48 hours for surface-dry conditions and 2-3 weeks for thorough drying. Don’t rush this drying time, as moisture content affects the wood’s stability. Pro installation tip: Use a moisture meter to confirm the wood’s reached 19% or lower moisture content before ground contact. This guarantees proper preservation and prevents premature deterioration of your structure.
Can Treated Wood Be Painted or Stained Immediately After Purchase?
You shouldn’t paint or stain pressure-treated lumber immediately after purchase. The wood needs 30-60 days to dry completely, depending on weather conditions. While you’re waiting, test the wood’s readiness by dropping water on its surface – if it beads up, it’s still too wet. Once dry, you can apply different painting techniques or investigate staining options. Use oil-based primers for painting and select either oil or water-based stains for best results.
Is Pressure-Treated Wood Safe to Use for Vegetable Garden Beds?
You’ll want to be cautious when using pressure-treated wood for vegetable garden beds, especially if you’re committed to organic gardening. Modern pressure-treated lumber uses copper-based preservatives instead of the older CCA treatments, but chemical leaching can still occur. For food safety, you’re better off using naturally rot-resistant woods like cedar or redwood, or opting for alternative materials like composite lumber or untreated hardwoods for your raised beds.
How Often Should Outdoor Treated Wood Furniture Be Replaced?
Your outdoor treated wood furniture‘s lifespan typically ranges from 10-15 years when properly maintained. You’ll need to follow a regular maintenance schedule, including annual cleaning, sealing, and inspections. If you notice significant rot, splitting, or structural weakness, it’s time for replacement regardless of duration. Environmental factors like extreme weather, sun exposure, and moisture levels can accelerate wear, so you might need to replace pieces sooner in harsh conditions.
What’s the Difference Between Green-Treated and Brown-Treated Lumber?
You’ll find that green treatment and brown treatment are both pressure-treated lumber options, but they differ in their chemical composition and appearance. Green-treated lumber uses copper-based preservatives (typically CCA or ACQ) and has a distinctive greenish tint. Brown-treated lumber contains copper azole treatments and includes supplementary colorants to achieve an earthier, more natural appearance. Both options offer similar protection against rot, insects, and decay, but brown treatment’s aesthetic appeal often commands a higher price.