

When following the steps to tile an outdoor kitchen, maximum durability starts with a properly excavated, compacted gravel base and level formwork before pouring concrete. Porcelain tiles rated PEI 4 or higher with water absorption below 0.5 percent should be selected and paired with ANSI A118.4, compliant polymer-modified thinset. Cement board is installed using corrosion-resistant screws, movement joints are placed every 4.5 meters, and expansion joints are sealed with ASTM C920 silicone rather than grout. Each step below breaks down the technical details required for a long-lasting installation.
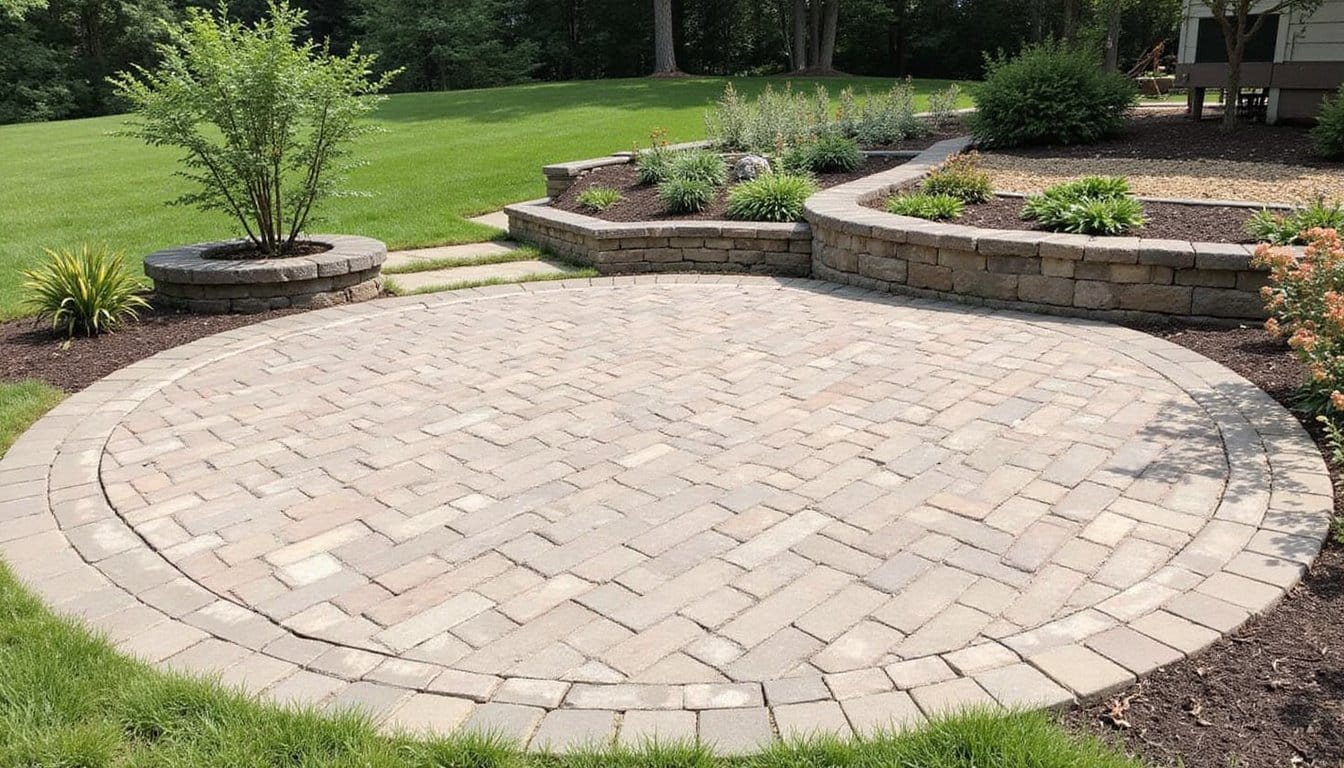
Prepare a Level Concrete Base That Drains Properly

Before you lay a single tile, you’ll need to excavate the site and establish a solid foundation. Dig a minimum of 6 inches below your planned pad depth, then utilize compacted base materials consisting of free-draining gravel. For clay soils, amend with lime, Type S mortar mix, and 3/4-inch clean stone before compacting with a jumping jack compactor.
Build your formwork using 2×6 lumber, positioning it precisely perpendicular or parallel to your house. Guarantee the form remains perfectly level using a string line or aluminum screeding bar. When working with marine ply as a base material, ensure minimal joins are positioned over the block work and properly supported for structural integrity. During this phase, install utility conduits for gas, water, and electrical lines before pouring concrete to ensure proper placement. In cold climates, your concrete footing must extend below the frost line to prevent shifting and cracking from freeze/thaw cycles.
To include drainage systems, add a gravel layer at the base and lay GF5 woven geotextile as a soil separator. Install 3 inches of #57 clean stone, geogrid, then repeat for a 9-inch total base depth.
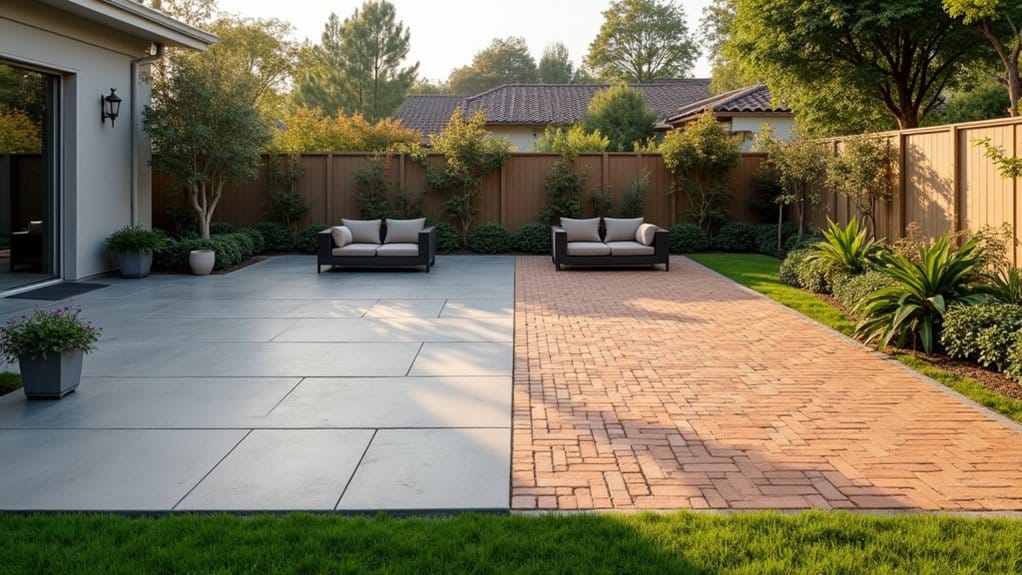
Choose Outdoor-Rated Porcelain or Ceramic Tile
When selecting tile for your outdoor kitchen, prioritize porcelain over ceramic for its superior performance characteristics. Porcelain’s kiln-fired composition achieves water absorption rates below 0.5 percent, vastly exceeding the three percent industry standard for outdoor applications. This ultra-low porosity guarantees frost resistant surface preparation remains effective through freeze-thaw cycles. Because porcelain doesn’t absorb water, it prevents algae, moss, and stains from penetrating the surface, making maintenance as simple as a quick jet wash.
Paver thickness considerations directly impact longevity, specify 20-millimeter tiles rather than standard 9-millimeter indoor variants. This doubled thickness absorbs impact force and prevents cracking under heavy loads. Select tiles rated PEI 4 or PEI 5 for maximal load-bearing strength beneath kitchen equipment. Porcelain stoneware tiles are resistant to thermal shock, meaning they remain unaffected by sudden temperature changes from hot grills or cold weather extremes. Additionally, porcelain’s UV and heat tolerance ensures rich colors won’t fade even under prolonged sun exposure.
For slip resistance, choose surfaces rated R10, R12 under DIN51130 certification. Wet zones require Dynamic Coefficient of Friction ratings exceeding 0.60. These specifications ascertain your installation performs reliably for 20+ years.
Pick Exterior-Grade Thinset and Grout
You’ll need exterior-grade thinset that meets ANSI A118.4 or A118.15 standards to guarantee your outdoor kitchen tiles withstand thermal cycling and moisture exposure. Look for polymer-modified formulations like Mapei Ultralite Mortar or Laticrete 254 Platinum, which provide the flexibility and low water absorption essential for freeze-thaw resistance. These modified mortars contain polymers that enhance strength and flexibility compared to basic unmodified versions made only of sand, cement, and lime. For large format tiles and heavy stone installations, consider Ardex X77, a microfiber-reinforced mortar that delivers exceptional performance in demanding exterior applications. Pair your thinset with weather-resistant grout specifically rated for exterior applications to complete a robust, long-lasting installation. When working with metal frames, ensure your cement board substrate is properly installed and sealed at all joints before applying thinset, as this non-combustible surface provides the stable foundation necessary for tile adhesion.
Exterior Thinset Selection Tips
Selecting the right exterior-grade thinset directly impacts your outdoor kitchen’s longevity and structural integrity. You’ll want polymer-modified formulations containing latex additives that deliver freeze-thaw resistance and superior bond strength. These products meet ANSI A118.1 standards while handling expansion-contraction cycles from seasonal temperature requirements.
When planning your installation, calculate coverage rates carefully, expect 80-90 square feet using a 1/4″ x 1/4″ x 1/4″ notch trowel. Your substrate must maintain minimum 40°F (5°C) temperatures during application. Premium exterior thinsets feature Microtec technology that provides resistance against heavy and driving rain penetration. Quality products like polymer fortified thinset are designed to mix with water only, eliminating the need for separate liquid additives and simplifying your installation process.
Key selection criteria for exterior thinset:
- Polymer fortification for weather durability and efflorescence resistance
- Frost-resistant formula compatible with concrete, masonry, and exterior plywood substrates
- Extended pot life (60 minutes) and open time (10-15 minutes) for precise positioning
- Medium bed capability up to 5/8″ thickness for large format tiles and GPTP installations
The proper thinset selection ensures a strong connection between tiles and substrate, which prevents displacement and potential safety hazards over time.
Weather-Resistant Grout Options
Because outdoor kitchens face constant exposure to moisture, temperature extremes, and UV radiation, your grout selection demands the same careful consideration as your thinset choice.
Calcium aluminate grout performance excels in exterior applications due to its low porosity, minimal water absorption, and resistance to efflorescence, a common issue with Portland-based alternatives. This formulation accommodates joint widths from 1/16″ to 3/4″ and develops strength rapidly near heat sources like grills. Ultracolor Plus FA is specifically recommended for exterior applications where these performance characteristics are essential.
For maximum durability, epoxy grout chemical resistance proves unmatched. Its 100%-solids formulation resists harsh chemicals, acids, boiling grease, and staining while maintaining color consistency. Compressive strength exceeds 7,000 psi, surpassing ANSI A118.3 requirements. Both options withstand freeze/thaw cycles, pressure washing, and heavy foot traffic. UV-stable formulations prevent yellowing, ensuring long-term aesthetic integrity in direct sunlight. Epoxy grout also serves as an excellent setting material for moisture-sensitive and resin-backed stones, making it ideal for natural stone installations in outdoor kitchens. GFTK’s 2-part epoxy grout brings over 30 years of research and development to deliver reliable performance in demanding exterior applications.
Attach Cement Board and Wire Lath With Proper Overlap
You’ll secure cement board to your outdoor kitchen frame using corrosion-resistant screws spaced every 6-8 inches, positioning fasteners 3/8 inch from edges and 2 inches from corners for maximum hold. Before attachment, embed each panel in a bed of thinset applied with a 1/4-inch square-notched trowel to create a solid, non-sinking substrate. For wire lath installation, you’ll overlap adjoining sheets by at least 1 inch at seams and 2 inches at corners, ensuring continuous reinforcement across the entire surface. Once your cement board is secured, you can apply your chosen veneer of choice such as stucco, stones, or tiles over the prepared surface.
Cement Board Installation Technique
When you’re ready to attach cement board to your outdoor kitchen frame, start by positioning the panels vertically over studs spaced 16 inches on center. Furring strip installation provides additional support when attaching to existing structures. Use cement board screws that penetrate 3/4 inch into studs, spacing fasteners 8 inches on center for walls and 6 inches for ceilings.
Master these cutting patterns before installation:
- Score lines multiple times with a utility knife against a carpenter’s square for clean breaks
- Snap boards along scored lines, then finish cuts on the reverse side through the fiber mesh
- Drill holes every 3 inches with a masonry bit for curved cuts
- Create X-pattern scores from corner to corner for cutouts, then tap centers with a hammer
Clamp delicate edges before driving screws to prevent breakage.
Wire Lath Overlap Requirements
Proper wire lath overlap guarantees structural integrity and prevents mortar cracking at seams in your outdoor kitchen installation. You’ll need to maintain a minimum lath overlap of 1 inch at vertical joints and ½ inch at horizontal seams per ASTM C1063. For stucco netting applications, increase vertical overlaps to 2 inches and horizontal overlaps to 1 inch.
At inside and outside corners, overlap sheets by 12 inches minimum to verify continuous reinforcement. Orient lath wires upward over your weather barrier to cup and hold mortar effectively. Maximum fastener spacing reaches 7 inches vertically and 16 inches horizontally along overlapped sections. Secure all overlaps with galvanized nails or staples every 6 inches, confirming screws penetrate wood studs by 5/8 inch minimum.
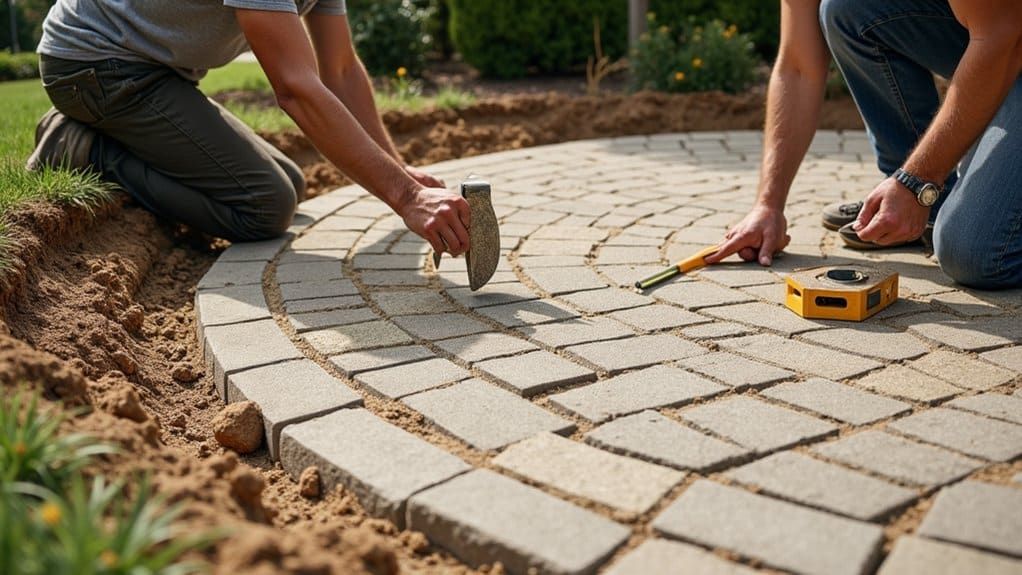
Align Your Tile Layout With Expansion Joints
The structural joints in your concrete substrate dictate where your tile layout must incorporate movement accommodation joints. You’ll need to guarantee proper layout planning that maintains structural alignment between your tile pattern and existing substrate joints. If pre-existing joints aren’t straight or don’t align with your tile pattern, you must design a compatible joint layout before setting any tile.
Your concrete substrate’s structural joints are the blueprint, every movement joint in your tile layout must honor their position.
- Position movement joints every 4.5 to 5 meters to create sections no larger than 25 square meters
- Guarantee tile expansion joints reach the full depth of pre-existing substrate joints
- Match your tile joint width exactly to the substrate joint width at structural locations
- Install perimeter joints at minimum 6 mm width at all junctions with fixed construction elements
Your joint network must form true partitions that accommodate thermal expansion without compromising installation integrity.
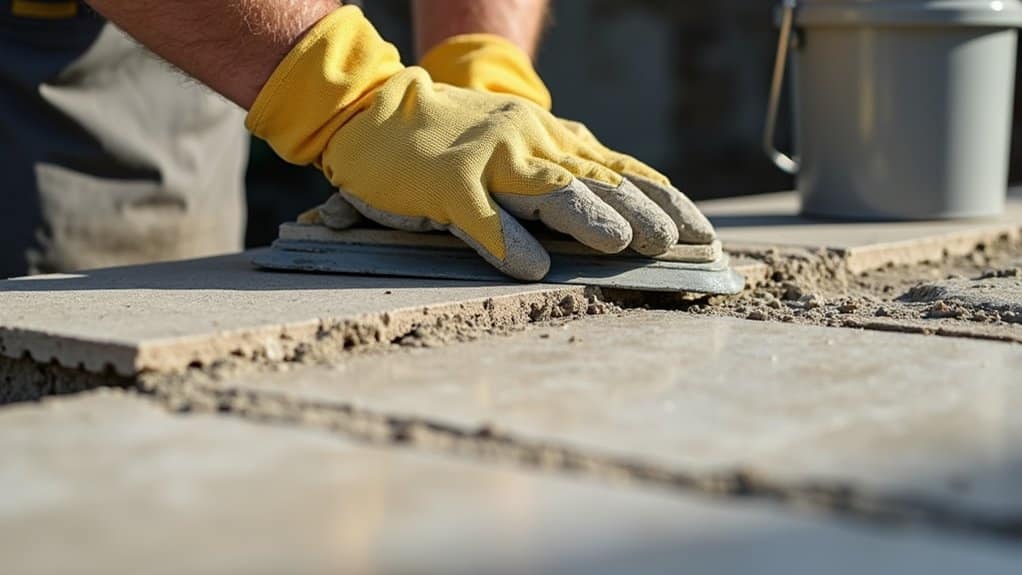
Back-Butter Every Tile for a Full Bond
To achieve 100% mortar coverage on your outdoor kitchen tiles, you’ll need to apply thinset to both the substrate and the tile back using the back-butter technique. Spread a thin layer across the tile’s underside with the flat edge of your trowel, working from center to edges to fill all pores and voids. Once you’ve set each tile into the combed mortar bed, tap it firmly with a rubber mallet to collapse the trowel ridges and eliminate any air pockets that could compromise the bond.
Apply Thinset Both Sides
Because outdoor environments expose tile installations to temperature swings, moisture infiltration, and UV degradation, back-buttering every tile isn’t optional, it’s essential for achieving the 100% mortar contact that prevents bond failure. To maximize thinset coverage, apply polymer-modified LHT mortar to your substrate first, keying it in with a notched trowel. Then guarantee thorough back buttering by spreading thinset across each tile’s back using your trowel’s smooth edge.
- Press tiles into substrate mortar with a slight twist to achieve full embedment and eliminate voids
- Use a trowel with notched and smooth edges to streamline the dual-application process
- Check mortar workability, thinset should stick to your finger within the 20-30 minute working window
- Work in shaded areas to prevent rapid drying and skinning that compromises mechanical bond strength
Tap Tiles Firmly Down
Each tile you’ve back-buttered requires immediate embedding into the substrate’s combed mortar bed, delay risks skinning that compromises bond integrity. Tap tiles firmly into place perpendicular to the combed ridges, then wiggle slightly to collapse notches completely. This technique achieves the 95% minimum coverage ANSI A108.5 mandates.
| Embedding Method | Coverage Result |
|---|---|
| Perpendicular beating-in | Maximum ridge collapse |
| Parallel placement | Incomplete contact |
| Wiggle confirmation | Verified adhesion |
| Edge support check | Full corner bonding |
Install tiles flush with countertop edges, ensuring corners receive complete mortar support. Periodically remove a tile to verify coverage, spots of thinset without full contact are unacceptable. Don’t exceed manufacturer-specified mortar thickness, typically 1/2-inch maximum. Scrape excess mortar from edges immediately using your trowel’s flat side.
Cut Tiles Cleanly Around Appliances and Pipes
Cutting tiles around appliances and pipes demands precise marking before any blade touches the surface. You’ll want to use carbide scoring tools to establish cut lines, then clamp a 4-foot level as a physical guide for your handheld saw. Maximize underside support during cutting by positioning plywood beneath the tile to prevent cracking.
Precise marking and proper support are the foundation of clean tile cuts, never let a blade touch an unprepared surface.
Select your equipment based on the specific cut required:
- Wet-cut table saws deliver precision for straight measurements around appliance perimeters
- 9-inch battery-powered handheld saws provide mobility for cuts near fixed pipes
- Angle grinders with continuous diamond blades handle 45-degree corner cuts
- Tile pinchers remove small increments for curved cuts around obstacles
Minimize blade angle drift by completing cuts in single passes from edges inward.
Set Spacers for Even, Professional Grout Lines
When you’re ready to position your tiles, spacer selection directly impacts the final appearance of your grout lines. Contextual spacer selection depends on tile type, size, and outdoor conditions, choose spacers ranging from 1/16 to 3/8 inch accordingly. For centered layouts, 1/8-inch spacers help you avoid narrow cuts at edges.
Insert spacers at each corner where four tiles meet, pressing them firmly against tile edges. Half spacer placement at outside corners and wall edges guarantees consistent grout line width throughout your outdoor kitchen surface. Choose outdoor-compatible leveling spacers designed for tiles up to 2-3 cm thick.
Work in small sections, adjusting spacers as needed before adhesive sets. Tap tiles gently with a tapping block to seat them firmly against spacers.
Seal Expansion Joints With Silicone, Not Grout
Proper spacer placement guarantees uniform grout lines, but expansion joints require a fundamentally different approach, you’ll seal these with ASTM C920-certified silicone sealant rather than grout. This certification verifies your sealant meets rigorous sealant performance standards for elastomeric properties, accommodating horizontal and lateral movement during thermal cycling.
Silicone’s moisture barrier effectiveness far exceeds rigid grout, which cracks under outdoor temperature fluctuations. You’re creating waterproof seals that prevent rot, mold, and structural deterioration.
- Flexibility: Silicone absorbs stress from expansion and contraction without transmitting force to tiles
- Waterproofing: Creates impermeable barriers where grout remains porous
- Application: Use a caulking gun for controlled dispensing, then smooth with a damp cloth
- Maintenance: Inspect regularly for shrinkage; silicone removes easier than grout for reapplication
Cure Outdoor Tile Before Rain or Frost Exposure
Your grout requires a minimum 72-hour initial cure before any rain exposure, with full hydration taking up to one week for maximum water resistance. Understanding timing requirements for grout curing prevents bond failure and surface degradation.
Temperature control for grout application demands maintaining tile surfaces between 10°C and 40°C throughout the curing process. Temperatures below 10°C disrupt hydration chemistry, causing cracking and weak joints. Conditions exceeding 40°C accelerate moisture loss, compromising structural integrity.
You’ll achieve ideal results by scheduling installation during spring when consistent temperatures prevail. Monitor weather forecasts to guarantee extended dry periods post-application. After the initial 48-hour drying phase, apply outdoor-rated sealer to cement-based grouts. This protective barrier blocks water ingress and prevents mold development before seasonal weather changes occur.
Frequently Asked Questions
Can I Install Outdoor Kitchen Tiles Directly Over Existing Plywood Surfaces?
You shouldn’t install tiles directly over plywood surfaces. Plywood expansion and contraction from outdoor moisture exposure causes tile adhesion failure, cracked grout lines, and popped tiles. Instead, you’ll need proper substrate installation using cement backer board or a decoupling membrane like Schluter Ditra over your plywood. Your subfloor preparation must include pressure-treated plywood at minimum 1-1/4-inch thickness, with panels offset and fastened every 6-8 inches for structural stability.
How Do I Choose Heat-Resistant Grout for Areas Near Grills?
For heat resistant grout selection near grills, you’ll want products rated up to 1000°C, like Vitcas Heat Resistant Tile Grout. Choose epoxy grouts meeting ANSI A118.3 standards for superior chemical resistance against grease and harsh cleaners. During heat tolerant grout application, you’ll use 3mm joints for standard tiles and guarantee excellent adhesion to porous surfaces. Select polymer-fortified options with low porosity to prevent degradation from food residues and thermal cycling.
What Countertop Materials Work Best Alongside Tiled Outdoor Kitchen Surfaces?
You’ll achieve ideal durability by pairing your tiled surfaces with stain resistant stone options like granite, quartzite, or porcelain. These materials complement waterproof tile sealants you’ve applied to surrounding areas, creating a cohesive moisture barrier. Quartzite offers superior UV resistance and heat tolerance near grill zones, while porcelain’s non-porous composition eliminates annual sealing requirements. For humid climates, soapstone’s dense structure resists moisture infiltration effectively. Each option maintains structural integrity alongside properly sealed tile installations.
Should I Install Appliances Before or After Tiling My Outdoor Kitchen?
You should install appliances before tiling your outdoor kitchen. This approach guarantees a proper tile layout sequence by allowing you to trace precise cutouts in cement board around appliance frames, eliminating gaps that require caulking. First, level and secure your appliance frames, then attach cement board with cutouts. Understanding waterproofing substrate importance, apply your membrane after substrate prep. Finally, set tiles up to appliance edges for clean, professional termination points.
How Do I Handle Dry Stack Stone Tiles That Require Minimal Joints?
You’ll achieve efficient joint spacing by staggering vertical seams course-by-course to prevent aligned weak points. Start with level surface preparation, establish a secure baseline on concrete footing before setting your first row. Work one course at a time, positioning panels tightly together while twisting each stone into the thinset bed to eliminate air pockets. Dry stack veneer doesn’t require grout, so you’ll maintain that seamless aesthetic while ensuring structural integrity throughout your installation.