
You can transform your backyard with hardscaping ideas that match your site’s specific conditions. Budget-friendly gravel patios start around $1.85 per square foot, while natural stone delivers unique veining and color for a high-end look. Multi-level designs tame sloped yards, and permeable pavers let 70, 80% of rainfall infiltrate the ground. Fire pit patios extend your outdoor season well past fall. Each approach below breaks down the details you’ll need to get started.
Gravel and Concrete Patios on a Budget
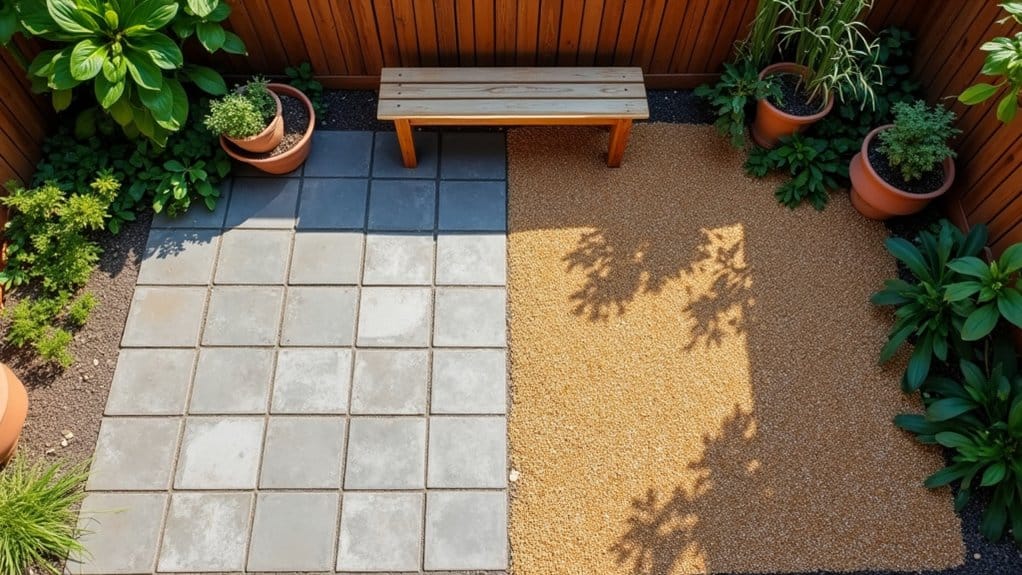
A flat patch of compacted earth is all you need to start building a budget patio that holds up season after season. Pea gravel runs $1.85, $3.39 per square foot for materials alone, while gray concrete costs $10, $12 per square foot, making both strong options for budget friendly patio makeovers. For a 200-square-foot DIY gravel patio, expect roughly $1,203 total, including landscape fabric, edging, and a compacted ¾-inch gravel base laid 4, 6 inches deep. Concrete pavers fall between $5, $12 per square foot for materials when you factor in sand and base layers. Once pavers are set level and square, install plastic paver edging around the perimeter and fill joints with polymeric sand before running a plate compactor over the surface. Whichever surface you choose, establishing hardscape maintenance schedules early, recompacting gravel seasonally, sealing concrete biennially, protects your investment and keeps the patio visually sharp year-round.
Natural Stone Patios for a High-End Look
When you’re ready to move beyond budget surfaces and invest in a patio that commands attention, natural stone delivers a high-end look no manufactured material can replicate. Each slab carries unique color variations and veining that add depth to your outdoor space, blending effortlessly with modern, traditional, or rustic architecture.
Climate appropriate selections guarantee your stone withstands freeze-thaw cycles without cracking. Pairing honed and rough-cut pieces creates surface texture contrast that’s both visually dynamic and functional for grip. Expect higher upfront costs, a 500-square-foot patio requires roughly five days for a three-person crew, but the payoff is a durable feature that ages beautifully, boosts resale value, and demands minimal maintenance beyond occasional sweeping, rinsing, and periodic sealing. During installation, incorporating a slight slope for drainage directs water away from your home and prevents pooling that could compromise the stone over time.
Multi-Level Patio Ideas for Sloped Yards
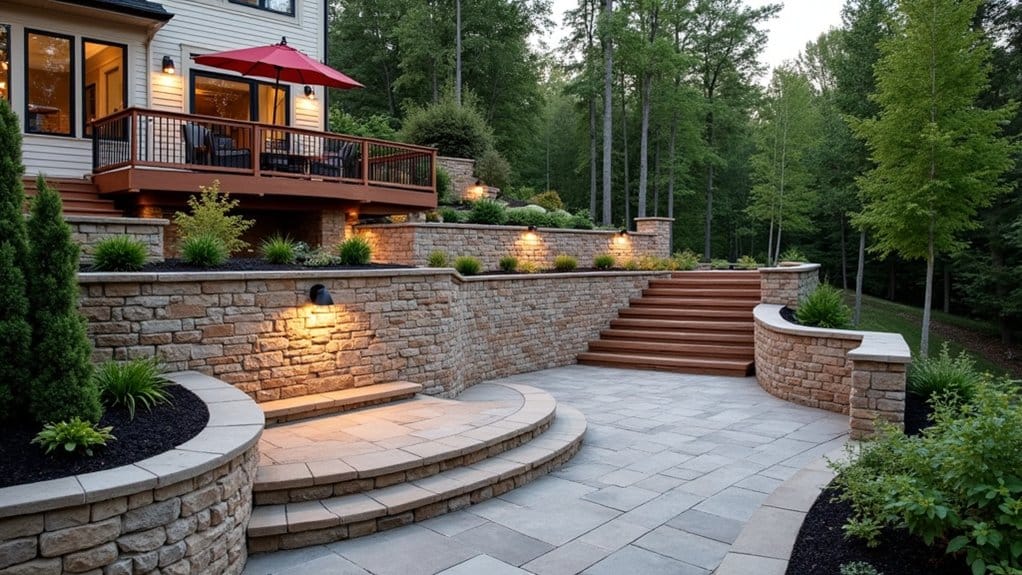
Because a steep grade often feels like a design obstacle, most homeowners don’t realize it’s actually their biggest asset for creating layered outdoor living space. Cascading steps connect distinct functional zones, grilling and dining up top near your kitchen, conversation seating at mid-level, and a quiet reading nook or hot tub retreat below.
Elevated platforms improve sightlines and transform unusable slopes into multiple flat areas. You’ll want retaining walls in stone, brick, or concrete to stabilize soil and define each terrace. Wraparound configurations follow your yard’s natural contours, maximizing square footage while creating private corners with varied views. Add ramps at a 1:12 slope for accessibility, and consider glass railings that maintain safety without blocking the landscape. Each level doubles your usable outdoor space. Before building, observe your yard during a rainstorm to identify natural water flow patterns, ensuring your deck design incorporates proper drainage rather than fighting against the slope’s existing runoff.
Permeable Paver Patios That Fix Drainage Issues
If your yard pools water after every rainstorm, permeable pavers let rainfall pass through their joints and into a layered stone base, infiltrating 70% to 80% of annual rainfall directly into the ground. You can position a permeable patio strategically to intercept runoff before it reaches your foundation, eliminating the need for French drains or regrading while recharging the soil beneath. Understanding the base-layer construction, underdrain options for tight soils, and long-term cost savings will help you design a patio that solves drainage problems without sacrificing style.
How Permeable Pavers Work
Unlike standard paver installations that channel water off surfaces and into storm drains, permeable paver systems capture rainfall right where it lands and direct it downward through engineered layers. Wide joints (1/4, 3/8 inch) filled with clean aggregate allow water to pass into a 12, 24-inch reservoir base of angular open-graded stone, where voids temporarily store runoff before it infiltrates into native soil.
| Feature | Standard Pavers | Permeable Pavers |
|---|---|---|
| Joint Fill | Polymeric sand | Crushed stone aggregate |
| Base Depth | Standard | 30% deeper |
| Infiltration Rate | Near zero | 100+ in/hr |
| Runoff Reduction | Minimal | Up to 80% |
| Groundwater Recharge | None | Active |
Routine permeable paver maintenance, vacuuming joints and replenishing aggregate, preserves infiltration capacity and supports long term durability across seasons.
Solving Foundation Water Problems
When rainwater sheets off a standard patio and pools against your home’s perimeter, it generates hydrostatic pressure that pushes moisture through foundation walls and accelerates settling beneath footings. Permeable pavers function as proactive foundation waterproofing solutions by distributing infiltration across the entire surface rather than channeling concentrated flows toward vulnerable structural elements.
Unlike reactive drainage mitigation strategies that redirect water after accumulation, permeable installations intercept rainfall at contact. Water passes through joint aggregate into graded base layers, recharging soil gradually while maintaining proper slope away from your structure. You’ll reduce basement flooding risk substantially while preserving surrounding landscape integrity, no erosion channels cutting through garden beds or saturated zones destabilizing root systems. The patio itself becomes your first line of defense, managing thousands of gallons on-site each season.
Costs and Installation Tips
Because permeable paver patios require a markedly deeper base structure than standard hardscaping, their installed costs reflect both material upgrades and intensive site preparation.
| Cost Component | Per Square Foot | 300 Sq Ft Total |
|---|---|---|
| Materials (pavers, gravel, fabric) | $5, $12 | $1,500, $3,600 |
| Labor | $10, $20 | $3,000, $6,000 |
| Total Installed | $16, $26 | $4,800, $7,800 |
You’ll spend more on angular gravel bases alone, six to eighteen inches deep, than most standard patio foundations require. Steep grades, old surface removal, and curved layouts push costs higher. Simple square patterns reduce labor time considerably.
DIY installation challenges center on achieving proper base compaction and consistent joint spacing for drainage performance. Without precision here, you’ll undermine the system’s function entirely. Professional installation also addresses long-term maintenance requirements, ensuring gravel-filled gaps stay clear and infiltration rates hold over time.
Fire Pit Patio Designs for Year-Round Use
You can anchor your patio around a fire pit built from natural stone, poured concrete, or brick pavers, each offering distinct aesthetics and heat tolerance that should match your hardscape’s existing material palette. Pairing your fire pit with a covered or semi-enclosed patio layout lets you push outdoor gatherings well past summer, using gas-powered ignition or wood-burning setups to generate instant warmth during cooler months. Adding integrated seating, retractable wind barriers, and smart-tech controls turns the space into a functional year-round retreat rather than a seasonal afterthought.
Gathering Space Material Options
Don’t overlook ground cover, decomposed granite provides superior drainage and heat resistance, while lava rock demands virtually no maintenance around high-temperature zones.
Extending Seasonal Outdoor Use
Although most homeowners search for fire pits during late spring’s peak season, the real return on investment comes from designing a fire pit patio that performs well into November and beyond, when that secondary demand surge confirms people want warmth outdoors, not just ambiance.
To build a fire pit patio that functions across seasons, focus on these core elements:
- Covered structures, 44% of experts recommend covered patios with fire pits for element protection, using weather resistant materials that handle freeze-thaw cycles.
- Wind barriers and retractable enclosures, block smoke drift while maintaining airflow around open flames.
- Temperature controlled designs, pair bioethanol or propane fire pits with infrared heaters to sustain comfort below 50°F.
- Multi-functional units, select fire pits doubling as grills or tables, maximizing your patio’s utility year-round.
Outdoor Kitchen Patios With Built-In Stone Grills
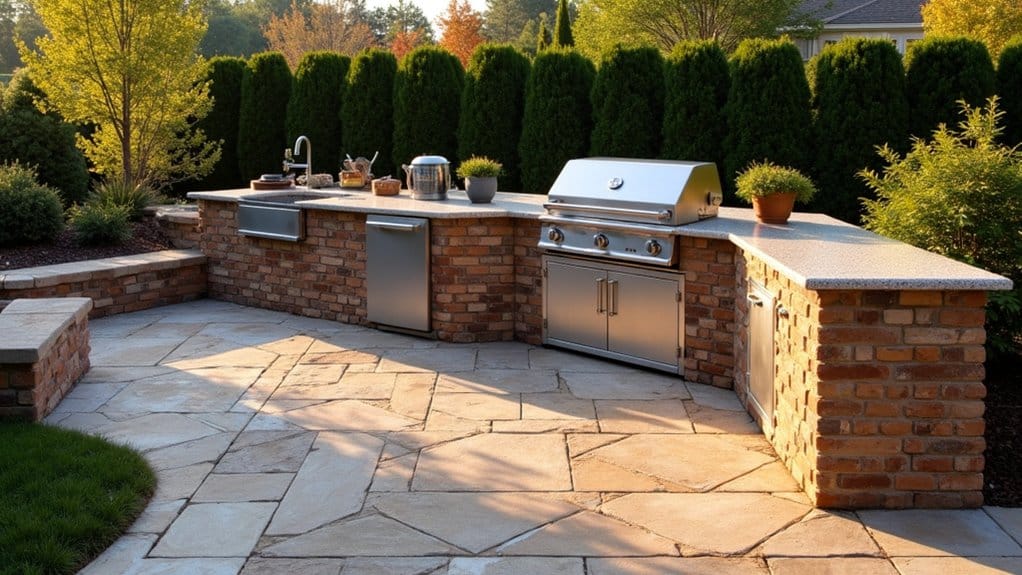
An outdoor kitchen patio with a built-in stone grill transforms underutilized yard space into a functional cooking and entertaining zone that holds up season after season. Seamless stone grill islands wrapped in veneer like Ochre XL Panels create an earthy, modern focal point while hiding utilities beneath a heavy stone presence. Position your grill on the work side and stools on the guest side for natural flow.
Modular outdoor kitchen components let you start compact, one grill, prep counter, storage cabinet, then expand into U-shaped or L-shaped layouts that define distinct zones for cooking, prep, and seating. Use quartzite veneer for a high-end look without excessive weight, and seal every surface to withstand heat, moisture, and temperature shifts.
Built-In Patio Lighting for After-Dark Entertaining
Everything about your outdoor kitchen, the stone veneer, the seating layout, the grill island, disappears the moment the sun drops below the treeline, unless you’ve planned for light. Recessed fixtures embedded into deck boards and step risers provide a subtle glow that doubles as wayfinding. Staggered outdoor-rated pendants over dining surfaces create focal warmth without overwhelming the space.
Layered lighting turns an invisible outdoor kitchen into an inviting nighttime destination the moment the sun sets.
Consider these layers for a complete lighting plan:
- Recessed step lights flush-mounted into hardscape surfaces for safety and architectural definition
- Bluetooth-controlled fixtures supporting programmable light schedules for seasonal entertaining
- Solar post cap lights along railings for zero-wiring perimeter illumination
- Wireless smart bulb options integrated with your home system for app-based color and intensity adjustments
Match cord and fixture finishes to surrounding materials for visual cohesion.
Frequently Asked Questions
How Often Should Concrete or Paver Patios Be Resealed for Protection?
You’ll want to follow an ideal resealing frequency of every 2, 3 years for exposed concrete or paver patios, though high-traffic areas may need attention annually. Climate matters, freeze-thaw cycles and intense UV accelerate wear. Proper resealing techniques include cleaning thoroughly, choosing a sealer matched to your surface’s exposure, and applying even coats during mild weather. Perform a simple water-bead test each year to confirm your hardscape’s protective finish remains intact.
Can Hardscaping a Backyard Patio Increase Your Home’s Resale Value?
Yes, hardscaping your backyard patio can deliver increased property value, with quality installations recouping 55, 60% of costs at resale. When you integrate patios, walkways, and outdoor kitchens with mature plantings, you’ll see uplift potential of 10, 20%. Beyond financial returns, enhanced outdoor aesthetics create move-in-ready appeal that attracts buyers faster. You’ll want to select materials and layouts that complement your site’s grading, sightlines, and existing architectural details for maximum impact.
Do Gravel or Sand-Set Pavers Shift After Freeze-Thaw Cycles?
Yes, both can shift, but sand-set pavers are far more vulnerable. Sand retains moisture, amplifying soil heaving patterns during freeze-thaw cycles and causing paving stone settling issues across your patio surface. You’ll notice uneven joints and rocking underfoot. A compacted crushed gravel base of 4, 6 inches interlocks tightly, resisting movement while draining water effectively. Pair it with a thin sand leveling layer and polymeric joint sand to maintain long-term stability.
What Is the Total Cost Range for a Backyard Hardscape Project?
You’ll typically spend between $3,000 and $80,000+ on a backyard hardscape project, depending on scope, materials, and site conditions. Your project budget considerations should account for gravel at $1, $5 per square foot or pavers at $8, $20, both cost effective hardscape options that adapt well to varying terrain. Factor in labor, drainage requirements, and design complexity, as site-specific challenges like grading or retaining walls can dramatically shift your final investment.
Are Concrete Slab Patios Prone to Cracking in Extreme Temperatures?
Yes, concrete slab patios are highly susceptible to cracking under extreme temperatures. When you’re designing your patio, you’ll need to account for concrete slab expansion driven by heat cycles and moisture-related cracking from freeze-thaw exposure, where water expands 9% inside existing fissures. You should specify 4, 6% air entrainment, maintain a 0.40, 0.45 water-cement ratio, and install control joints every 4, 5 feet to manage thermal stress across your slab’s surface.