Transform your outdoor wall into a living canvas using ten distinct DIY approaches. Start with a framed succulent display or create intricate mosaics from recycled materials. Shape wire hangers into sculptural elements, paint eco-friendly moss graffiti, or design mixed-media collages. You’ll combine natural textures, geometric patterns, and artistic lighting to craft a personalized outdoor gallery. From macramé to nautical rope art, these techniques will help you master the art of exterior wall transformation.
Living Art: Creating a Framed Succulent Display

Creativity merges with vertical gardening in a framed succulent display that transforms your outdoor wall into a living canvas. Start by selecting a weather-resistant frame with a depth of at least 2 inches, then install a sturdy wire mesh backing to support your plant arrangement.
Layer the frame with cactus soil and secure your chosen succulents in a thoughtful pattern, considering their growth habits and color variations. You’ll want to incorporate air plants between the succulents to add textural interest to your outdoor wall art. Position larger specimens in the direction of the center, graduating to smaller varieties along the edges.
This DIY project requires strategic placement of drainage holes and proper mounting techniques to guarantee your living artwork thrives. Install the frame at a slight angle to prevent water pooling, and position it where it’ll receive adequate filtered sunlight.
Transforming Broken Pieces Into Mosaic Magic
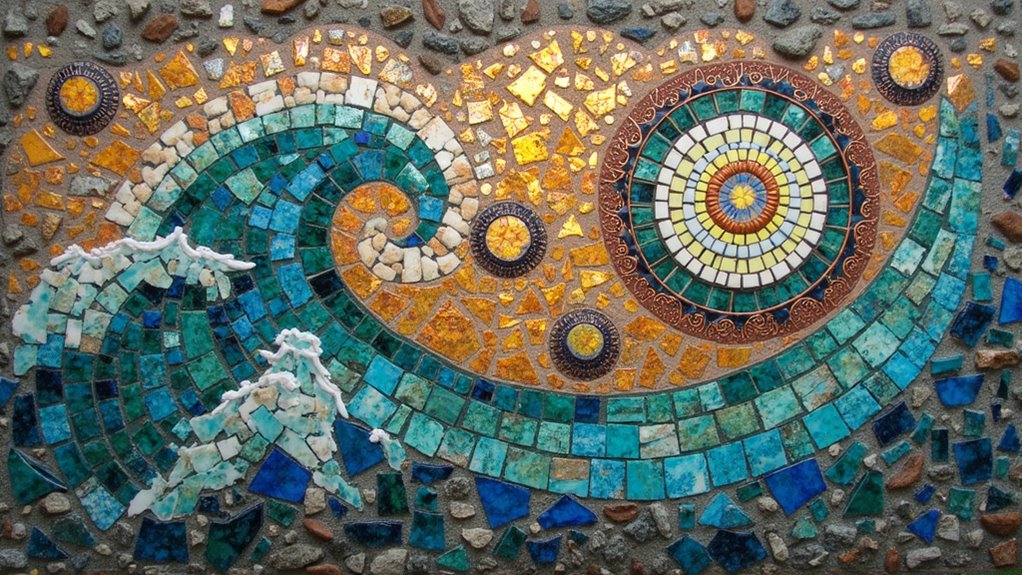
Transforming discarded ceramic tiles, broken plates, and glass fragments into a cohesive mosaic design requires careful planning and a clear vision of your final composition. You’ll need to arrange your shards by color, size, and texture while sketching your intended pattern on paper before committing to permanent placement on your outdoor wall. Consider the flow of your design by laying out the broken pieces on a flat surface first, ensuring proper spacing and visual balance between different materials and colors.
From Shards To Art
When broken ceramics and glass pieces scatter across your floor, they present an opportunity to create stunning mosaic wall art that boosts your outdoor space. You’ll transform these fragments into a DIY masterpiece by carefully arranging and adhering them to create dynamic patterns and textures.
| Material Type | Best Use Case | Installation Tips |
|---|---|---|
| Ceramic Shards | Large Patterns | Apply adhesive evenly |
| Mirror Pieces | Light Effects | Space consistently |
| Glass Fragments | Color Accents | Seal thoroughly |
Your outdoor wall becomes a canvas for this artistic transformation. Position each piece deliberately, considering how light interacts with different materials and textures. The process requires patience as you build your design, but the result is a unique focal point that amplifies your outdoor space while giving discarded items new purpose and beauty.
Planning Your Mosaic Design
Three essential steps lay the foundation for your mosaic masterpiece: collection, composition, and layout planning.
Start by gathering diverse broken materials ceramics, tiles, glass, and mirrors. You’ll create a richer design by incorporating varied textures and colors. Before adhering any pieces, lay out your complete pattern on a flat surface to visualize the final art piece. This pre-planning stage lets you experiment with different arrangements and guarantee your design flows naturally.
When you’re satisfied with your layout, begin adhering pieces one section at a time. Keep your design cohesive by maintaining consistent spacing between elements. Consider how light will interact with reflective materials like mirrors and glass. Once you’ve secured all pieces, apply grout to fill gaps, then seal your artwork to protect it from outdoor elements.
Wire Hanger Sculptures for Outdoor Spaces
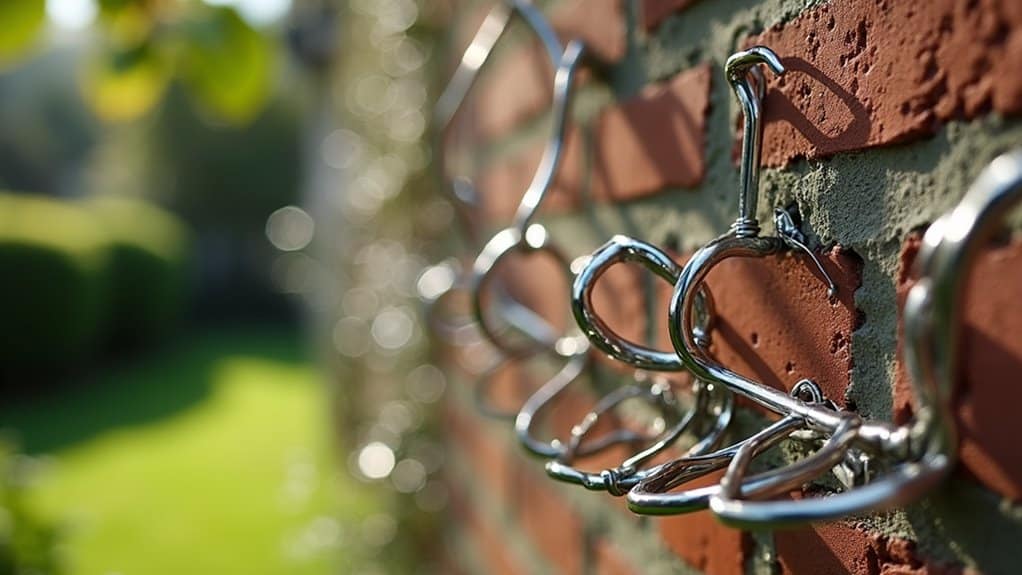
Through precise bending techniques, you’ll transform discarded wire hangers into sculptural frameworks that become striking outdoor wall features. Position your hands at strategic points along the wire to create deliberate curves and angles, maintaining consistent pressure to achieve professional-looking geometric or organic forms. You can weave air plants and decorative elements into your wire sculpture’s negative spaces, establishing a dynamic interplay between living materials and metallic structure.
Creative Wire Bending Techniques
Every discarded wire hanger holds the potential for artistic transformation in outdoor spaces. You’ll uncover that these malleable metal pieces can evolve into sophisticated DIY wall art when paired with proper bending techniques and creative vision.
- Create geometric frames by straightening the wire completely before rebending at precise angles
- Interweave multiple hangers to form web-like structures that catch light and cast intricate shadows
- Design natural borders around mirrors by gently curving hangers to follow organic shapes
- Craft plant holders by forming spiral coils that securely cradle air plants
- Develop multimedia pieces by combining wire forms with working with wood elements
Transform your outdoor art installation by manipulating these versatile materials into flowing shapes or rigid patterns. The structural integrity of wire hangers allows you to experiment with spatial relationships while maintaining durability in outdoor conditions.
Plant-Wire Art Integration
By combining living plants with sculpted wire hangers, you’ll create dynamic outdoor installations that blur the line between nature and artistic expression. Transform rusty wire hangers into sophisticated frameworks that serve as both art and plant support structures.
| Element | Application |
|---|---|
| Air Plants | Entwine within wire curves |
| Gemstones | Weave through metal frames |
| Mirror Borders | Shape wire as decorative edges |
| Natural Elements | Integrate with wire structures |
Position your entwined air plants strategically within the wire framework to heighten visual interest. The wire’s malleable nature allows you to craft intricate patterns that complement your outdoor space’s aesthetic. Used to create multimedia installations, these wire-plant combinations offer a sustainable approach to outdoor decoration. Consider incorporating local flora and weathered materials to amplify the organic appeal of your wall installations, ensuring each piece distinctly reflects its environment.
Natural Beauty: The Art of Moss Graffiti
Creating moss graffiti transforms ordinary outdoor walls into living art installations that merge natural elements with urban spaces. You’ll need a mixture of moss, buttermilk, water, and sugar to craft this eco-friendly design element that boosts your home’s curb appeal.
- Mix the ingredients to create a paintable moss consistency
- Apply directly to walls or mount on boards for removable art projects
- Guarantee proper moisture levels for moss growth and adhesion
- Consider strategic placement for ideal moss fastened results
- Experiment with patterns and designs for visual impact
This versatile technique lets you develop stunning outdoor features while maintaining the structural integrity of your walls. Whether you’re designing a focal point or adding subtle natural textures, moss graffiti offers a unique approach to incorporating living elements into your exterior spaces. The technique works just as well for small accents or bold statement pieces.
Urban Expression Through Spray Paint Artistry
Spray paint artistry has evolved from its underground roots into a sophisticated medium for transforming outdoor walls into stunning visual narratives. You’ll need a steady hand and creative vision to execute this bold design approach effectively.
When working with spray paint on outdoor walls, you can rapidly cover large surfaces while maintaining precise control over your artistic expression. Start by planning your design using stencils or freehand sketches, ensuring your composition fits the wall’s dimensions and architectural features. The versatility of graffiti techniques allows you to create intricate patterns, bold typography, or realistic imagery that adds personality to urban spaces.
Consider the wall’s texture and surface preparation before beginning. Your spray paint application should be deliberate and controlled, building layers of color to achieve depth and dimension in your artistic statement.
Making Your Mark With Outdoor Wall Murals
When you’re ready to make a lasting artistic statement, outdoor wall murals offer an expansive canvas for transforming blank surfaces into compelling visual narratives. Create a stunning focal point in your outdoor space by projecting your design onto the wall, then bringing it to life with a splash of color that reflects your creative vision.
Transform your blank outdoor walls into storytelling canvases with vibrant murals that capture imagination and create unforgettable focal points.
- Begin with a smooth, clean surface to guarantee professional results
- Project your chosen design onto the wall during evening hours for ideal visibility
- Map out major elements initially, then work on intricate details
- Use weather-resistant paints suitable for outdoor decor
- Consider the viewing angle and surrounding scenery when planning your composition
This large-scale artistic approach lets you customize your outdoor environment while showcasing your creativity. Whether you choose abstract patterns or detailed landscapes, your mural will become an integral element of your garden’s spatial design.
Mixed Media Magic: Crafting Textural Collages
Through the novel fusion of diverse materials, mixed media collages transform ordinary outdoor walls into enthralling dimensional masterpieces. By combining tiles, timber, metal, and stone, you’ll create depth and visual intrigue that raises your DIY outdoor wall beyond conventional design boundaries.
Start with a modern wooden base frame, then layer assorted textures and found objects to build your composition. Repurpose garage scraps, natural elements, and rope to craft a multi-dimensional installation that catches light and casts dynamic shadows. When planning your retaining wall’s artistic elements, consider how different materials interact and complement each other. Position heavier elements strategically while incorporating lighter materials for contrast. The result is a sophisticated, tactile display that proves even ordinary materials can become extraordinary when arranged with artistic intent.
Illuminating Patterns With Solar Fairy Lights
Solar-powered fairy lights offer an enchanting way to transform your outdoor walls into magical nighttime displays. This easy-to-craft project lets you create mesmerizing patterns that automatically illuminate as darkness falls. To transform your outdoor space into a spellbinding wonderland, consider these strategic placement options:
- Map out your design using small nails as anchor points for intricate geometric patterns
- Install lights along trellis frameworks to create vertical illuminated gardens
- Frame patio edges and eaves with straight-line configurations
- Create zigzag patterns across plain walls for dynamic visual interest
- Layer multiple strands at different depths for a three-dimensional effect
The lights work independently through solar power, eliminating the need for electrical connections. This sustainable lighting solution combines practical functionality with artistic expression, turning ordinary walls into sophisticated nighttime features that elevate your outdoor living space.
Weaving Wonder: Outdoor Macramé Projects
Beyond illuminated displays, outdoor walls present perfect canvases for tactile artistry through macramé weaving. People LOVE the boho-inspired aesthetic that macramé brings to outdoor living spaces, transforming blank surfaces into dimensional masterpieces.
You’ll want to select weather-resistant materials for your wall ideas, ensuring your creation withstands outdoor conditions. The versatility of macramé techniques allows you to craft intricate patterns that complement your existing décor while adding visual interest through texture and depth. Whether you’re a beginner or experienced weaver, online tutorials guide you through each knot and pattern.
Consider starting with simple geometric designs before advancing to more complex arrangements. The beauty of outdoor macramé lies in its ability to merge artistic expression with functional wall décor, creating a focal point that uplifts your outdoor living space.
Nautical Charm: Decorative Rope Art Designs
A myriad of nautical-inspired rope designs can transform your outdoor walls into stunning coastal showcases. When creating your rope wall art, make sure to select weatherproof materials that’ll withstand outdoor conditions while maintaining their aesthetic appeal.
- Create a lush network of intricate knots using macramé techniques for dimensional depth
- Weave rope in geometric patterns to establish a modern maritime aesthetic
- Consider adding hanging elements within your rope structure for layered visual interest
- Design rope nets as functional art pieces to display coastal artifacts
- Incorporate diverse rope thicknesses for textural contrast
Your rope wall art serves as both a decorative focal point and a sustainable design choice. By implementing different knotting and weaving techniques, you’ll craft a unique outdoor feature that brings nautical charm to your space while ensuring long-lasting durability against the elements.
Frequently Asked Questions
How to Design an Outdoor Wall?
You’ll want to start your outdoor wall design by considering landscaping design elements that create visual interest. Incorporate nature-inspired elements like climbing vines and wooden accents to soften hard surfaces. Layer your wall with varying textures and materials, such as trellises and colorful wall art. You can blend contemporary and rustic features while ensuring the wall’s aesthetic complements your home’s exterior color palette and surrounding environment.
How Do You Build an Outdoor Wall?
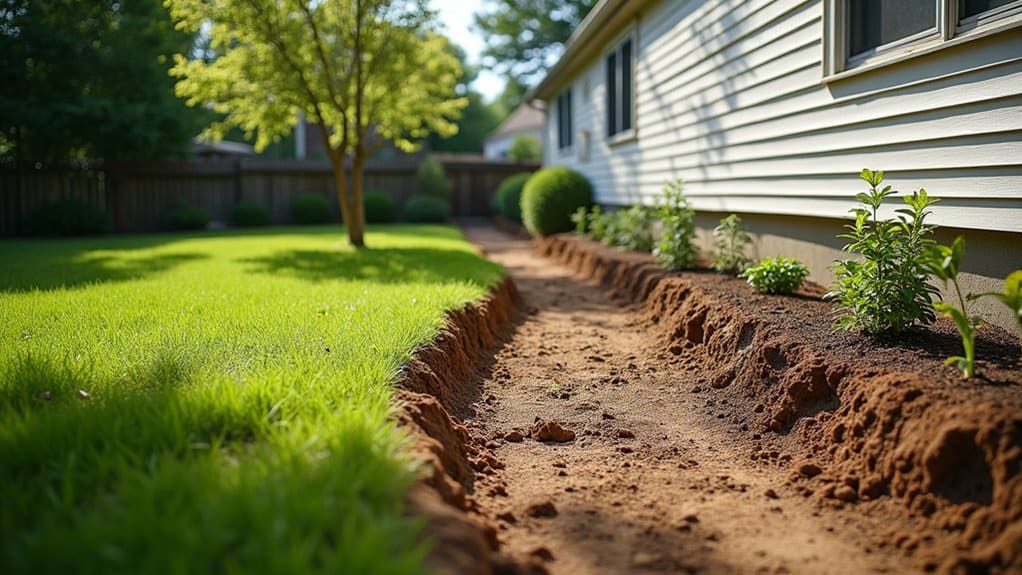
To build an outdoor wall, you’ll need to start with proper site preparation and foundation work. Initial, dig a trench below frost line and pour a concrete footing. Choose cost-effective construction materials like concrete blocks or natural stone, ensuring they’re weather-resistant finishes. Consider your landscaping considerations, including drainage and soil type. Layer your materials systematically, using appropriate mortar and maintaining level courses. Don’t forget to incorporate expansion joints for structural stability.
How to Decorate a Wall in Low Budget?
You can transform your wall with budget-friendly decorations using readily available repurposed materials. Create a vertical garden using old pallets, hang vintage frames in geometric patterns, or craft a macramé display using recycled rope. For space-saving solutions, install floating shelves from reclaimed wood, mount wire grids for hanging plants, or design a modular art display using painted tin cans. Don’t forget to incorporate thrifted mirrors to add depth and reflect light.
What Is the Best Material for Outdoor Wall Art?
For outdoor wall art, you’ll want to focus on weather-resistant materials like powder-coated aluminum or marine-grade stainless steel, which offer excellent durability against the elements. These metals provide lightweight construction while maintaining structural integrity. You can also consider treated hardwoods or high-grade PVC that won’t warp or fade. The best part is that these materials support customizable designs, allowing you to create unique pieces that complement your outdoor space’s aesthetic.